Below you will find the following manuals for "Pretty Buttons":
- Installation Pretty Buttons via download option
- Installation Pretty Buttons via Web option
- Configuration of Pretty Buttons
- Assign or adjust module position / page view Pretty Buttons
- Update Pretty Buttons
- Uninstall Pretty Buttons
For your information:
- The tutorials are written with Joomla 4.2 and Pretty Buttons 1.1.0 / 1.1.1.
- Click on the images to enlarge, the images will be shown in a pop-up window. Click next to the window to return to this article.
- Please note: that the module positions depend on your Joomla 4 template and may therefore differ.
More information can be found here: https://docs.joomla.org/Finding_module_positions_on_any_given_page
Installation Pretty Buttons via download option
Below are the steps to download and install Pretty Buttons in Joomla 4 using the download option.
- You can download the Pretty Buttons module from GitHub (free and without an account):
Download Pretty Buttons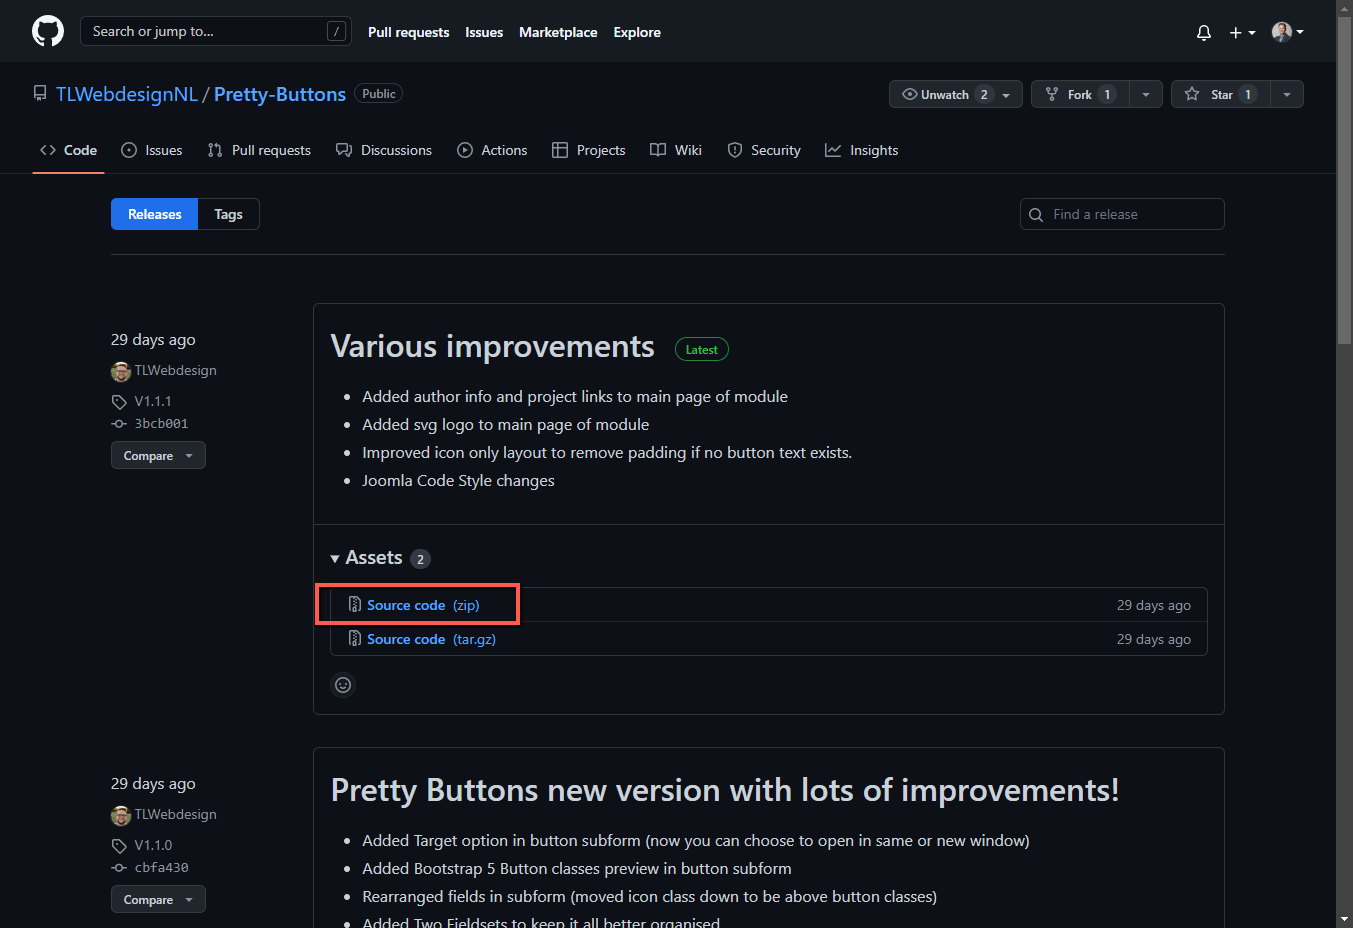
Click on Source code (zip), the file will be downloaded.
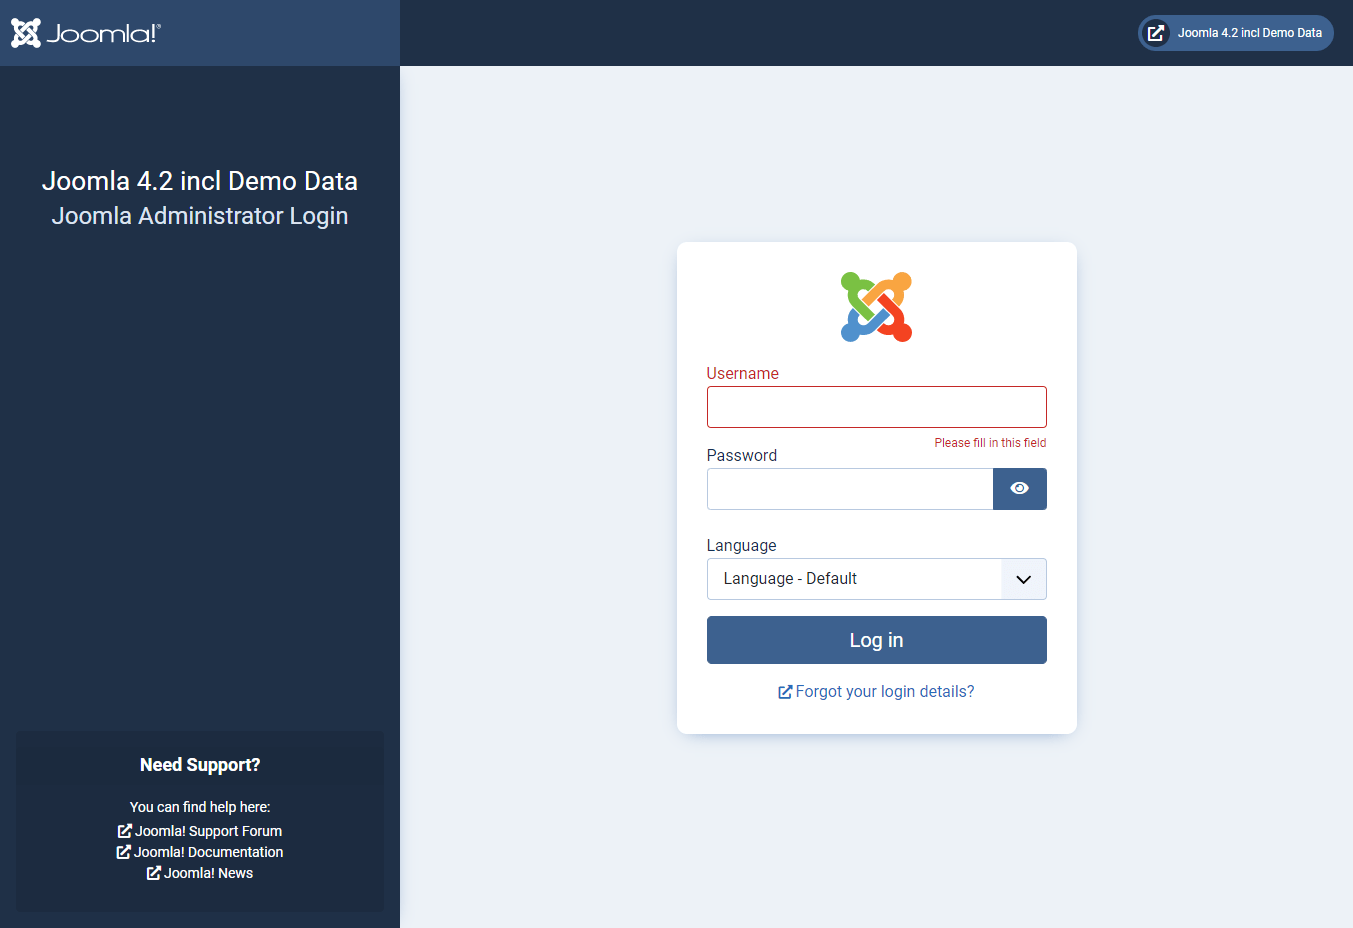
(Do NOT unzip the Zip file). Remember the location where you saved the file. - Log in to your back-end (administration section) of Joomla 4, usually accessed at: https://<yourdomain>/administrator/
- Log in with your Super Administrator account (SuperAdmin rights).
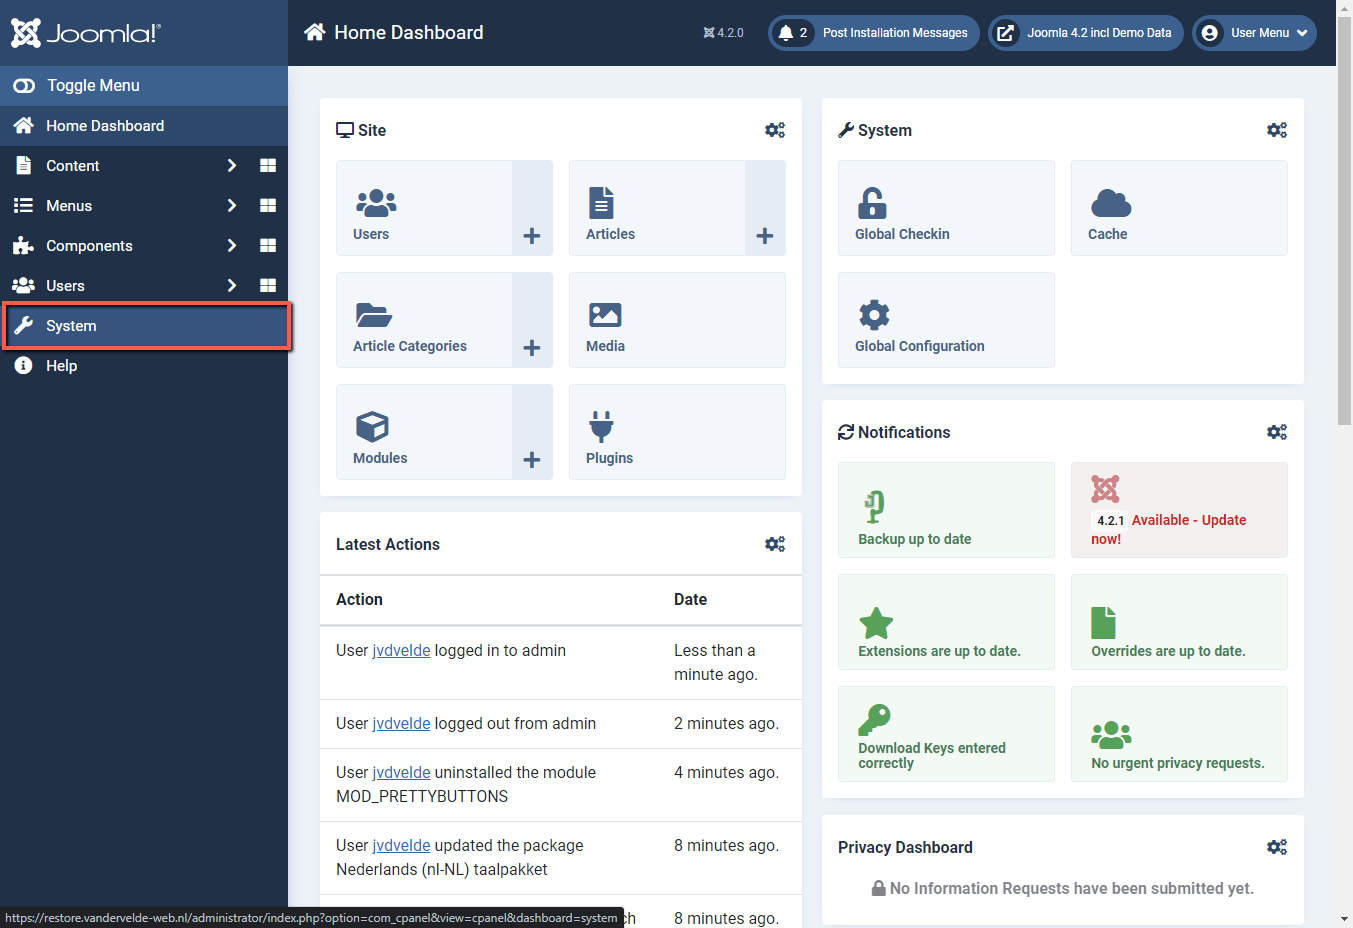
- In the Home Dashboard on the left, click on System.
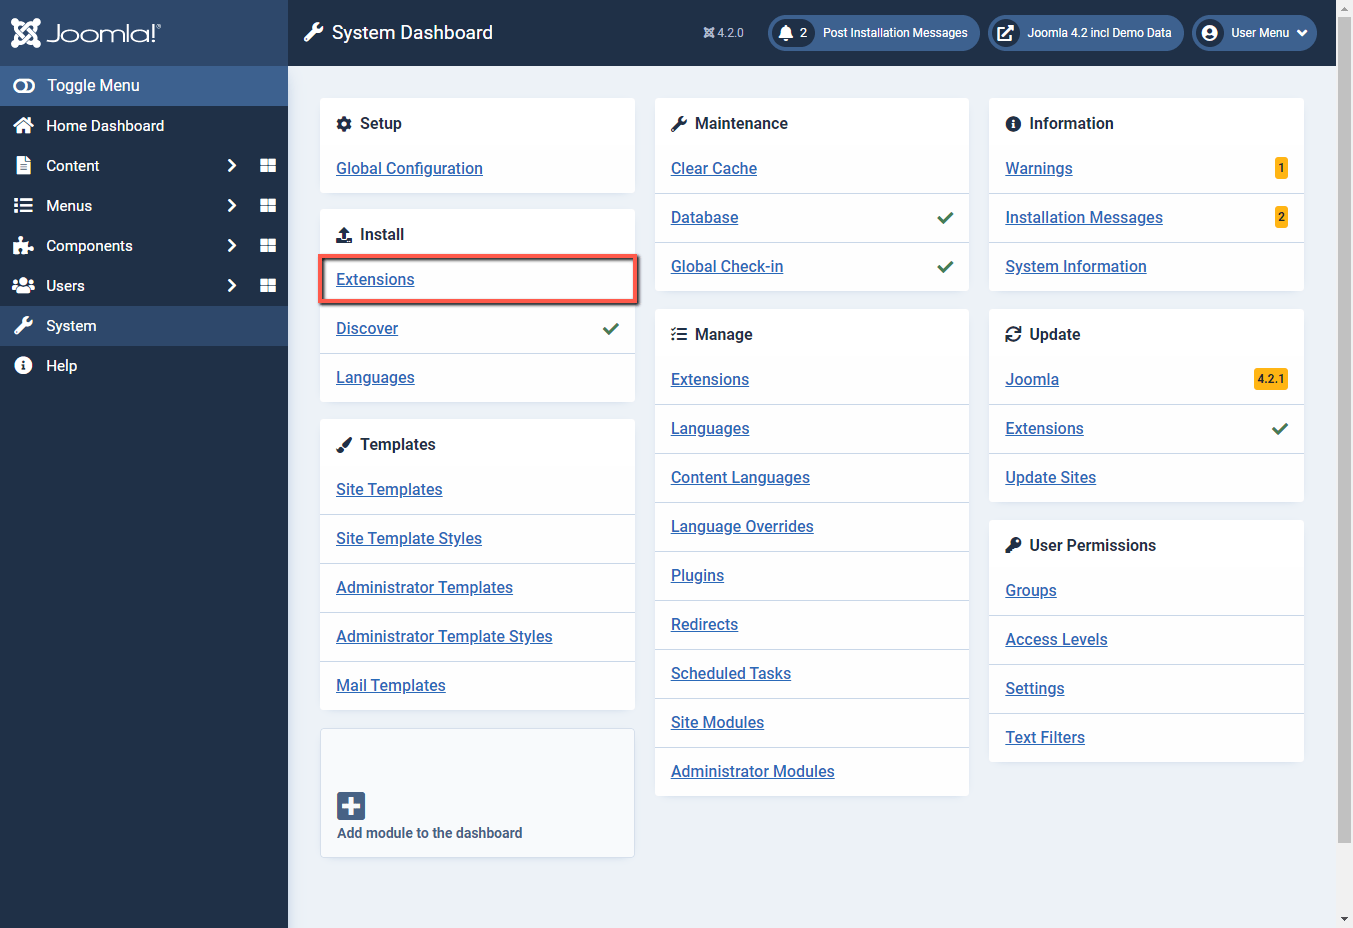
- Under the Install block, click Extensions.
- Click on the Upload Package File tab.
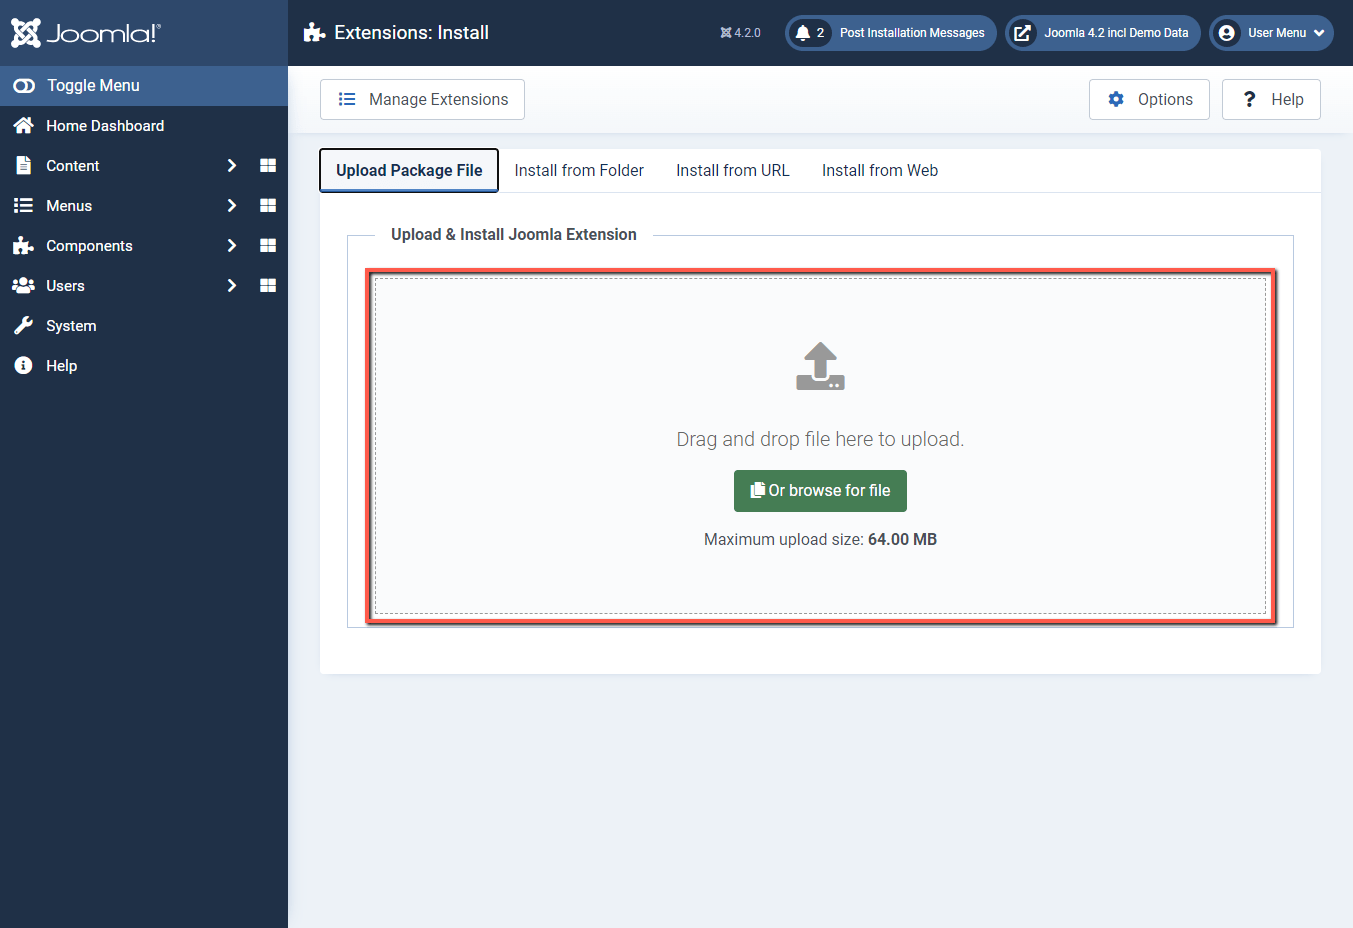
- You can drag the extension to the frame (Zip file),
or click the green button Or browse for file, navigate to the file and select it, then click Open.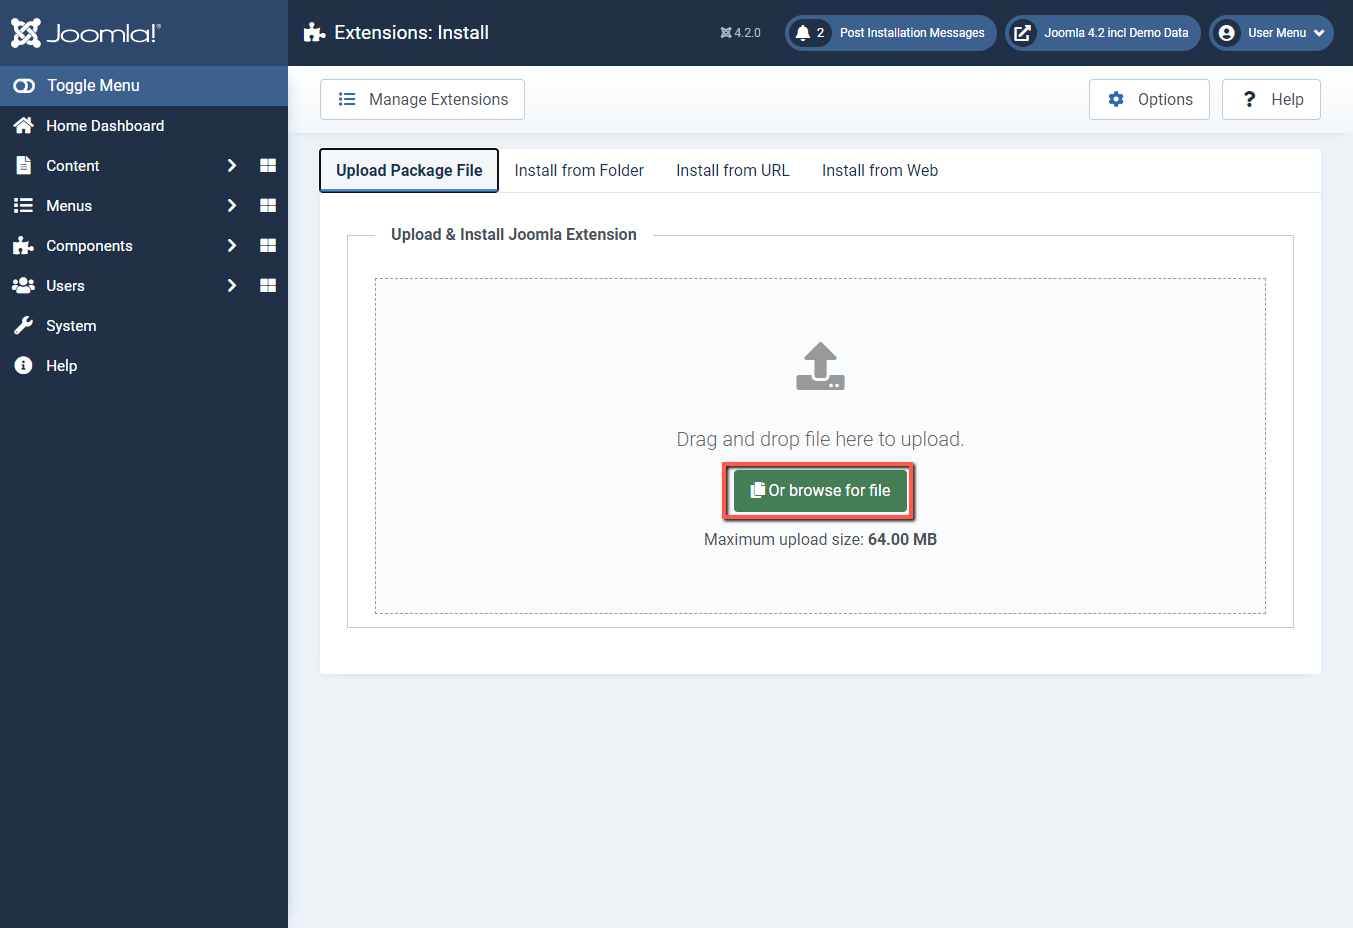
- The module is installed, a message appears on the screen: "Installation of the module was successful".
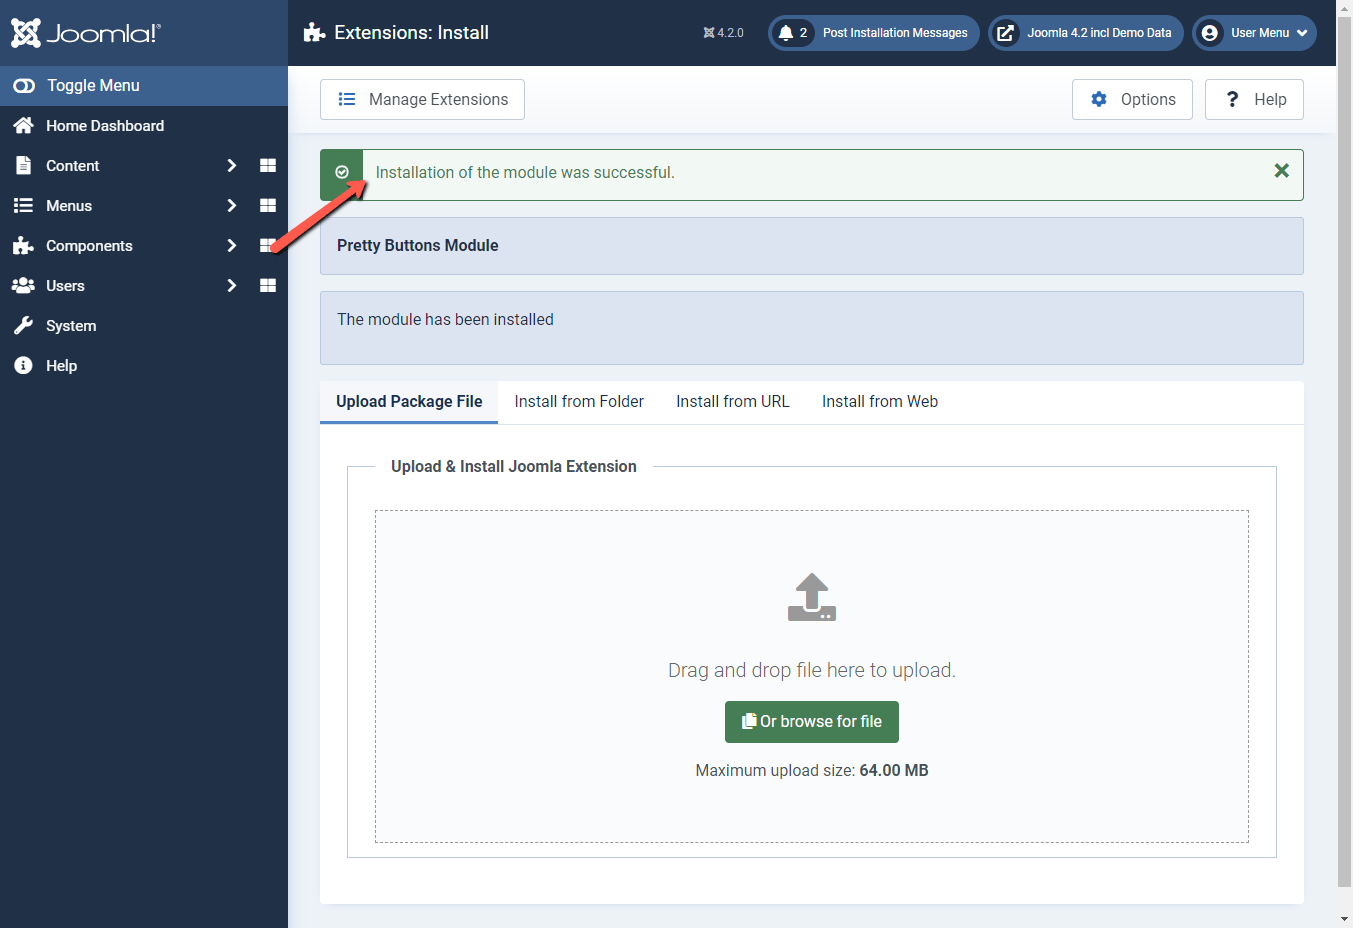
- You can now configure the Pretty Buttons module. See chapter Configuration Pretty Buttons.
Installation Pretty Buttons via Web option
Below are the steps to install Pretty Buttons in Joomla 4 using the Install from Web option.
You do need to activate this option if this option is disabled. (Enabling plugin: For this, click on System followed by Plugins and then search on Install from web, then activate the plugin).
- Log in to your back-end (administration part) of Joomla 4, usually accessible at: https://<yourdomain>/administrator/.
- Log in with your Super Administrator account (SuperAdmin rights).

- In the Home Dashboard on the left, click on System.

- Under the Install block, click Extensions.

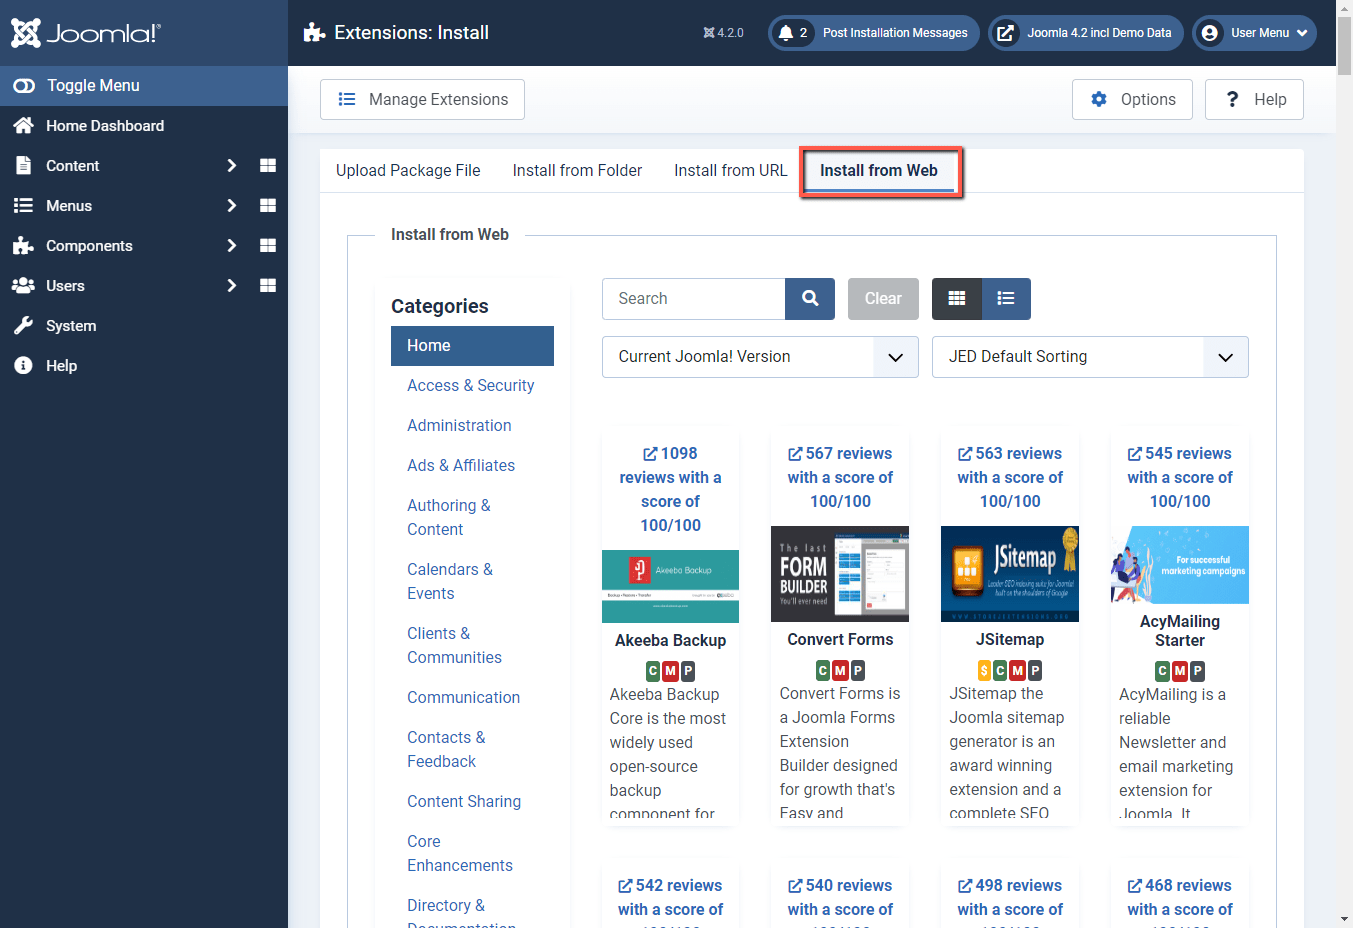
- Click on the tab Install from Web.
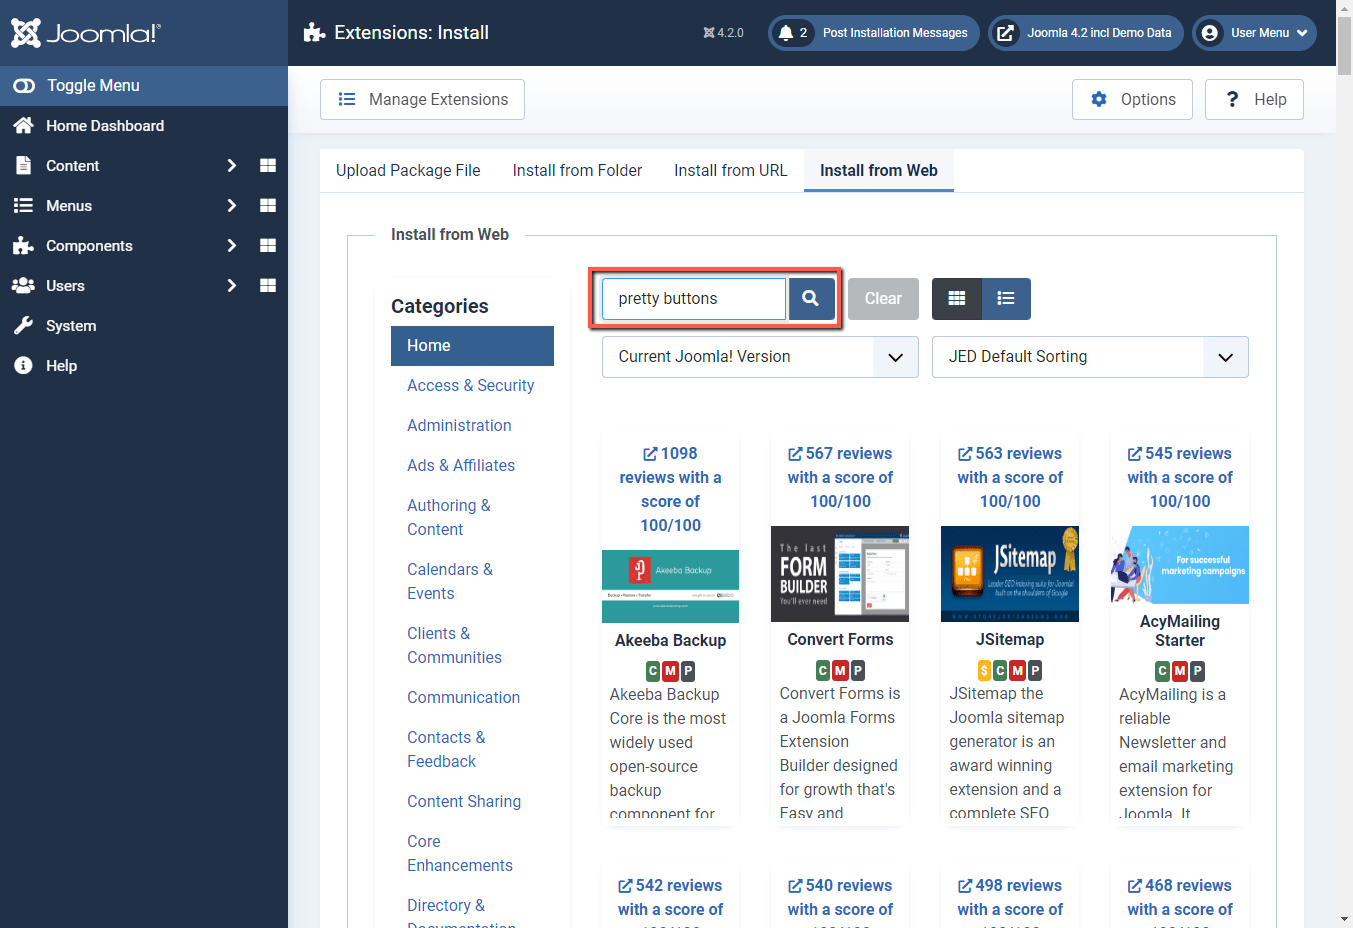
- Type in the Search window the name Pretty Buttons, then click on the magnifying glass.
- Then click on the Pretty Buttons module at the bottom.
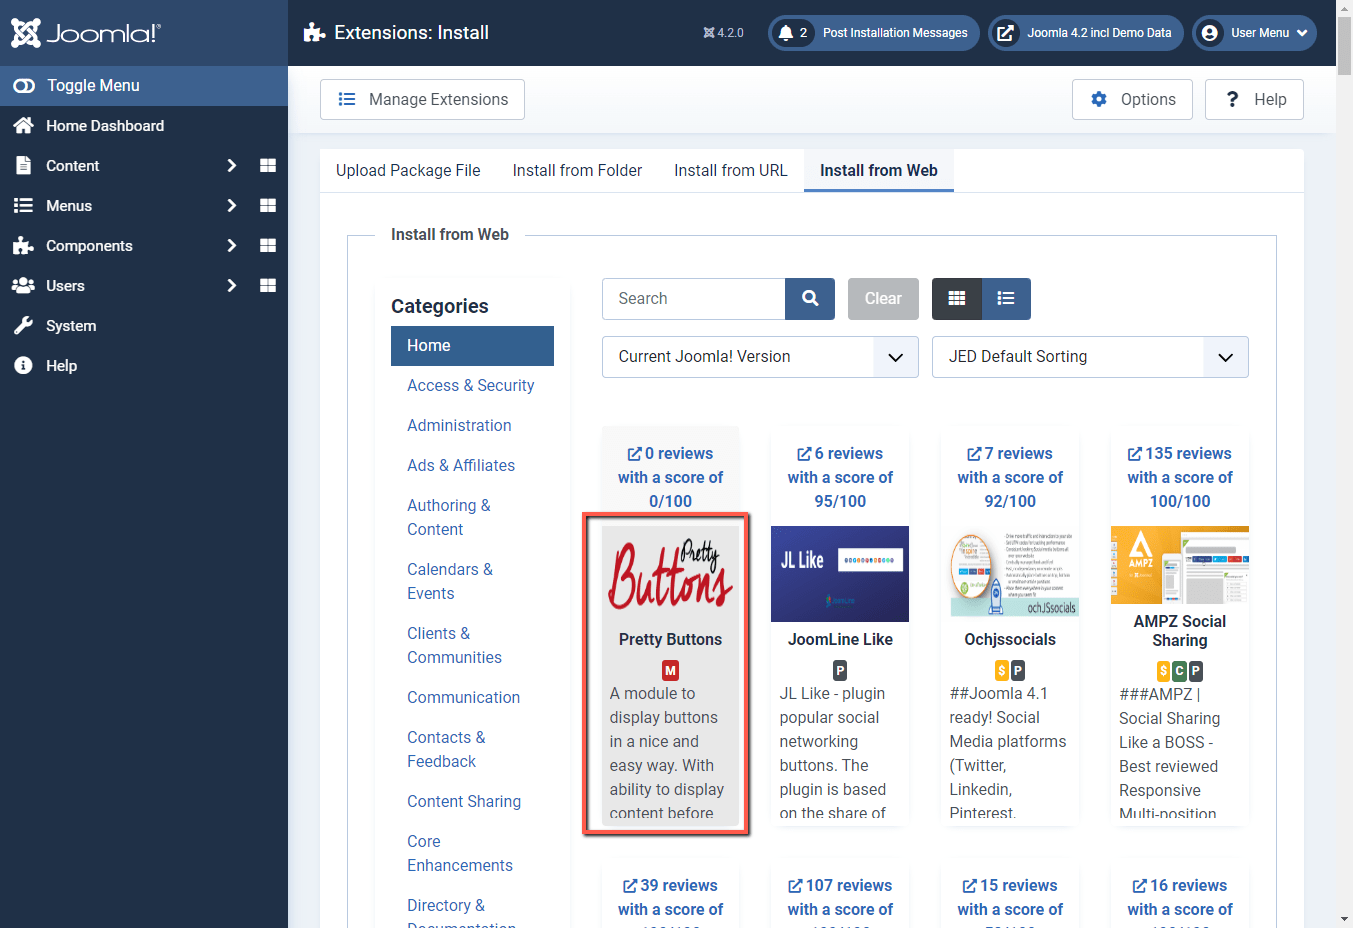
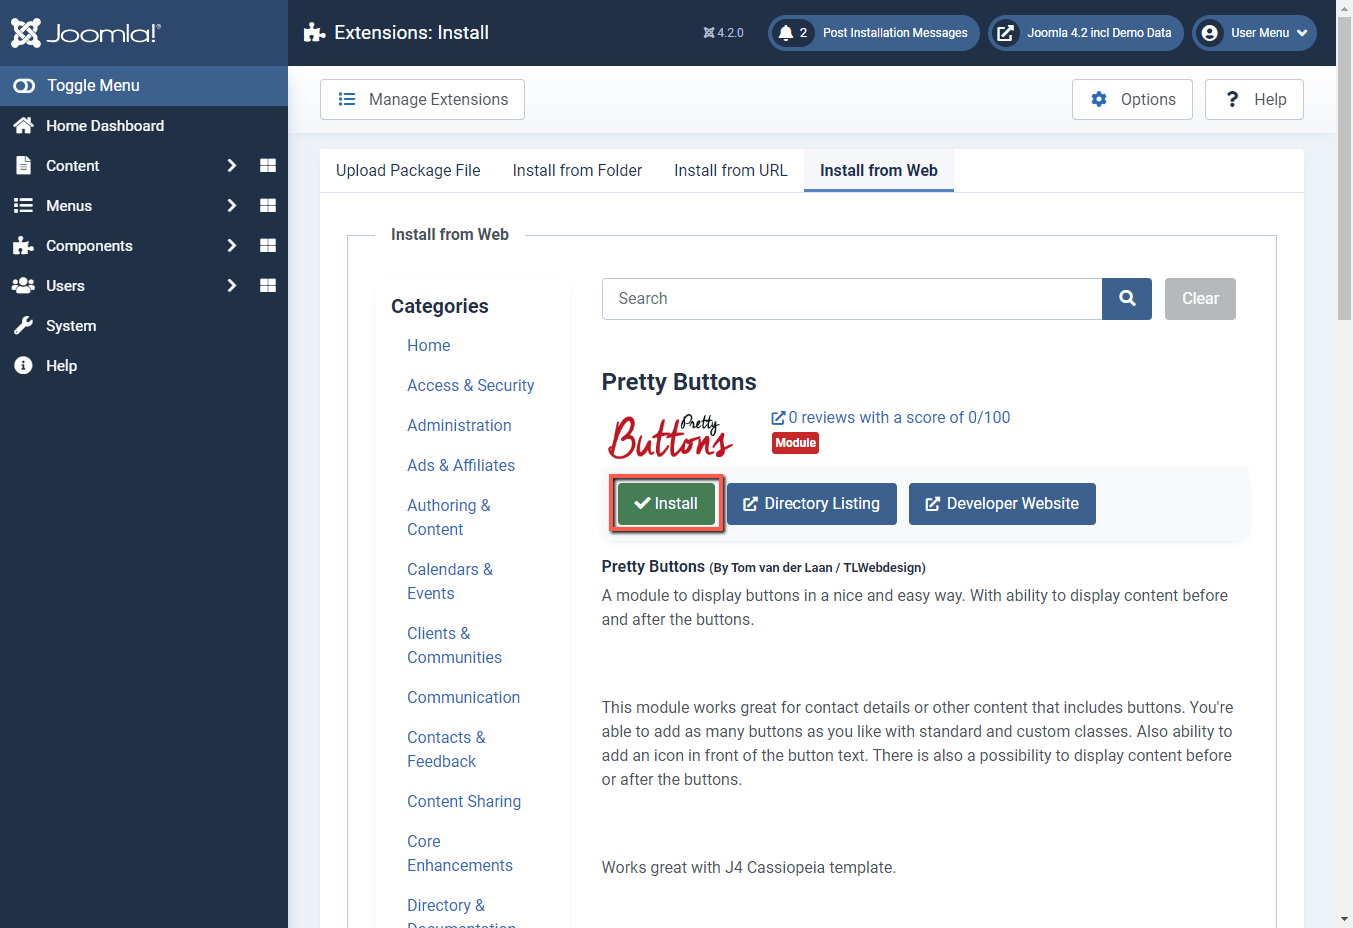
- Then click on the green button Install.
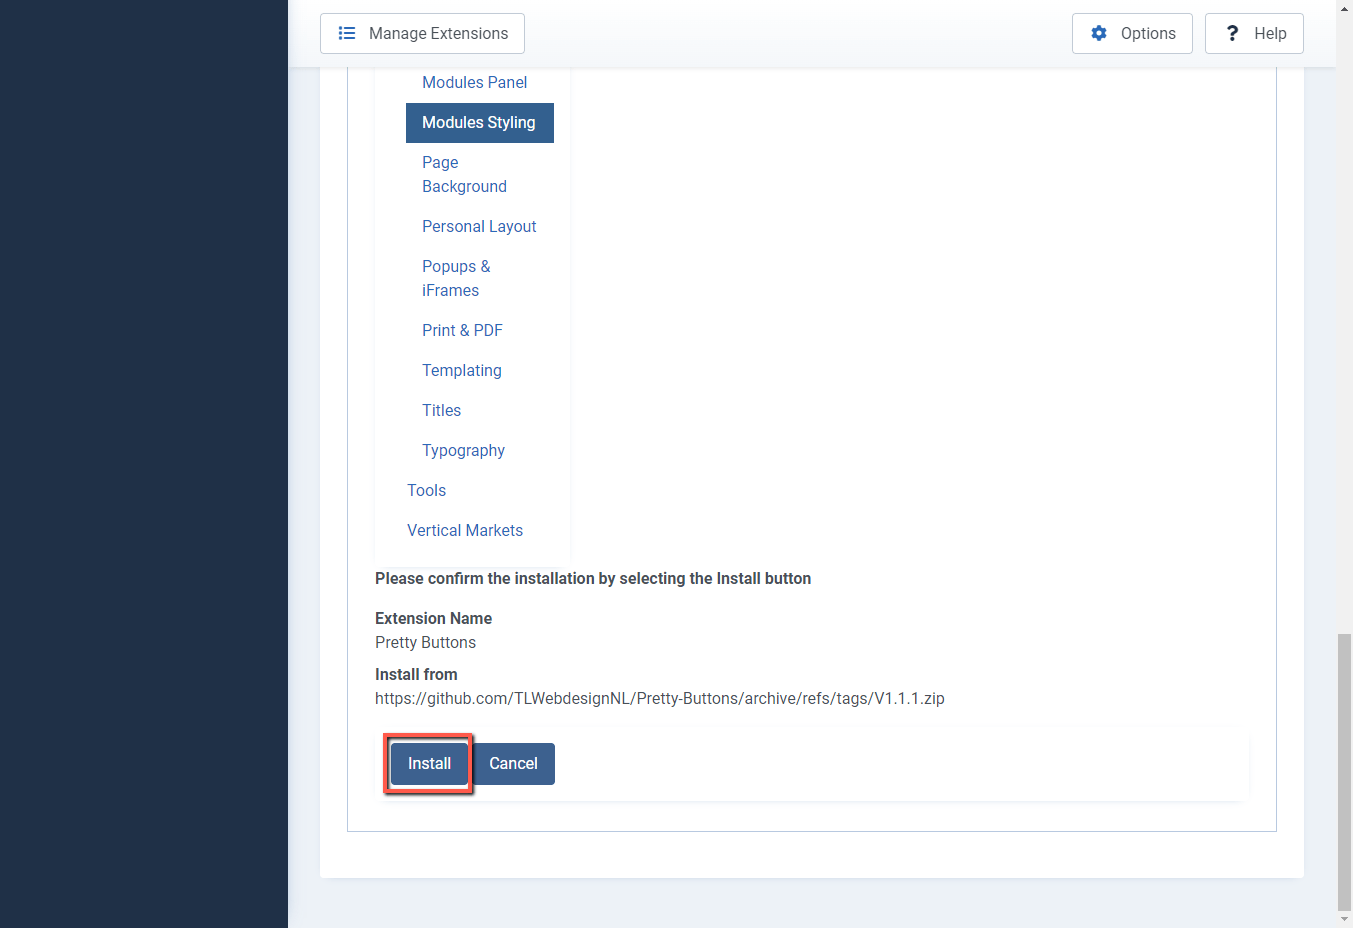
- Then click on the blue Install button at the bottom.
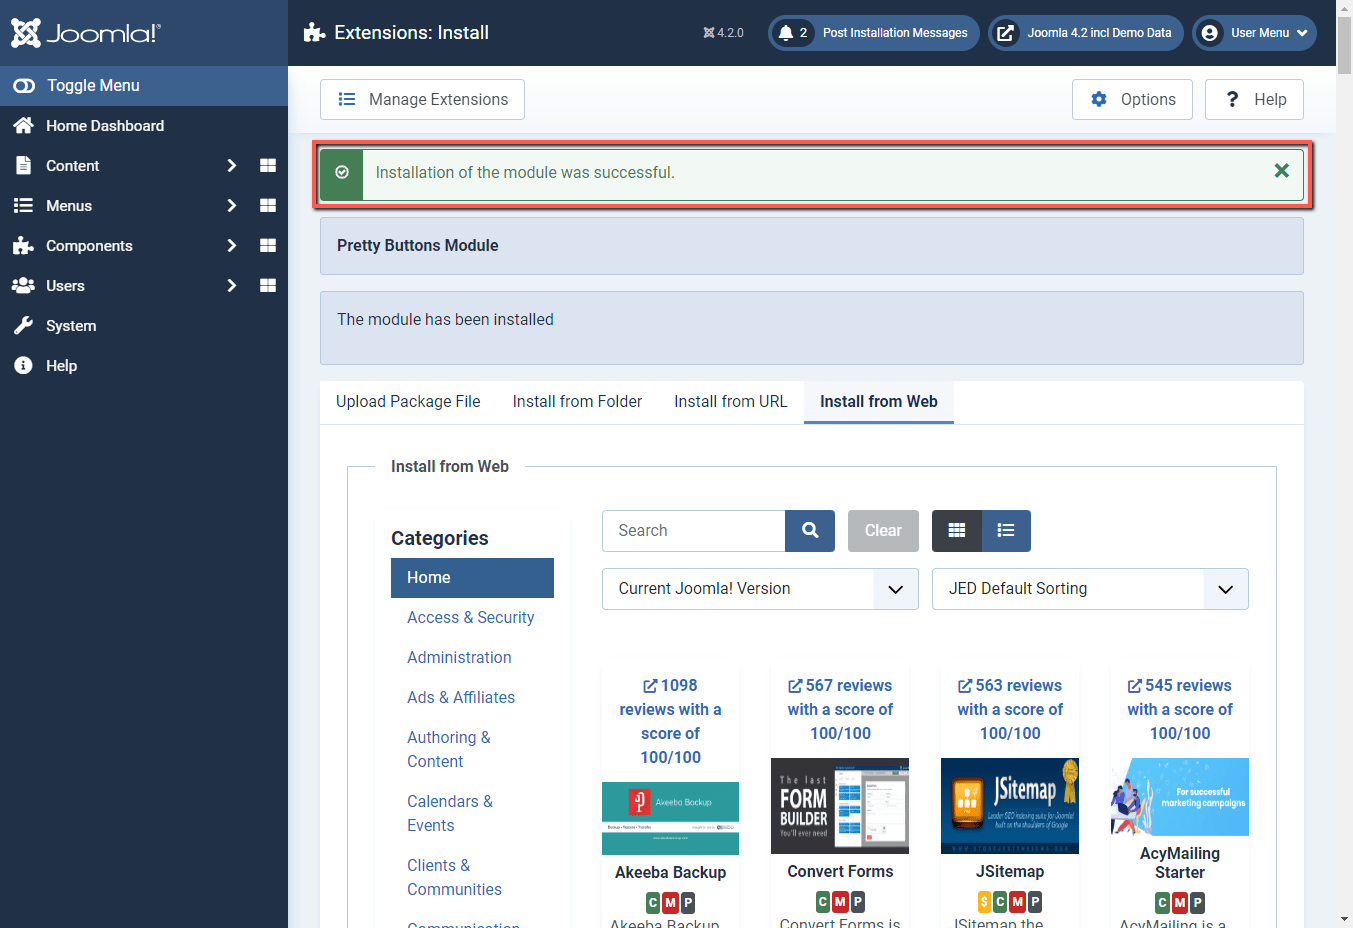
- The module is installed, a message appears on the screen: "Installation of the module was successful".
- You can now configure the Pretty Buttons module. See chapter Configuration Pretty Buttons.
Configuration Pretty Buttons
Below are the steps to configure Pretty Buttons in Joomla 4. You have installed Pretty Buttons using one of the methods from previous chapters.
- Log in to your back-end (administration part) of Joomla 4, usually accessible at: https://<yourdomain>/administrator/.
- Log in with your Super Administrator account (SuperAdmin rights).

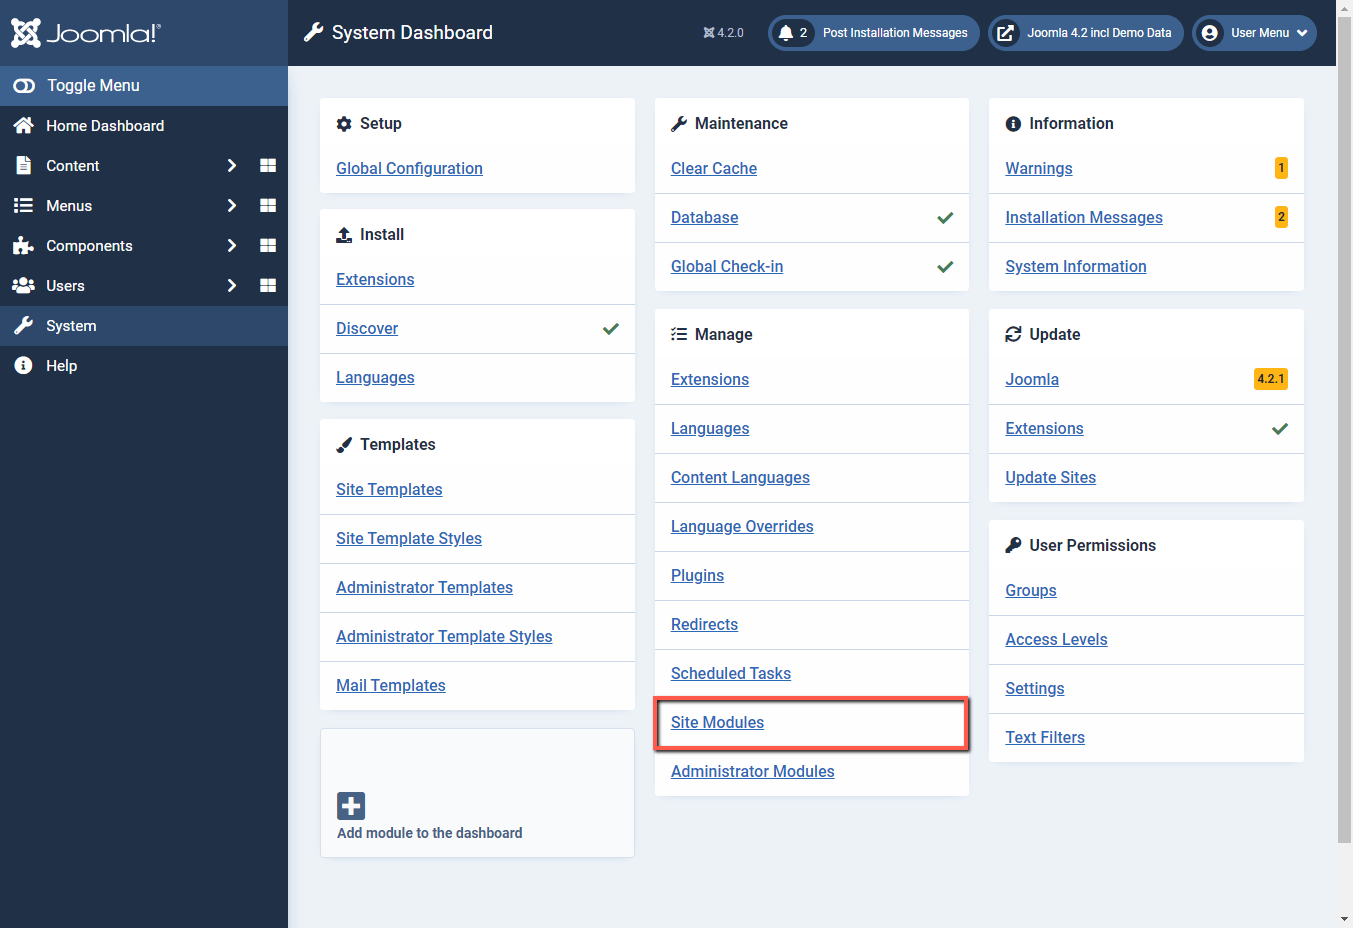
- In the Home Dashboard on the left, click on System.

- Under the Manage block, click Site Modules.
- You will see Pretty Buttons as a new module (Status Unpublished).
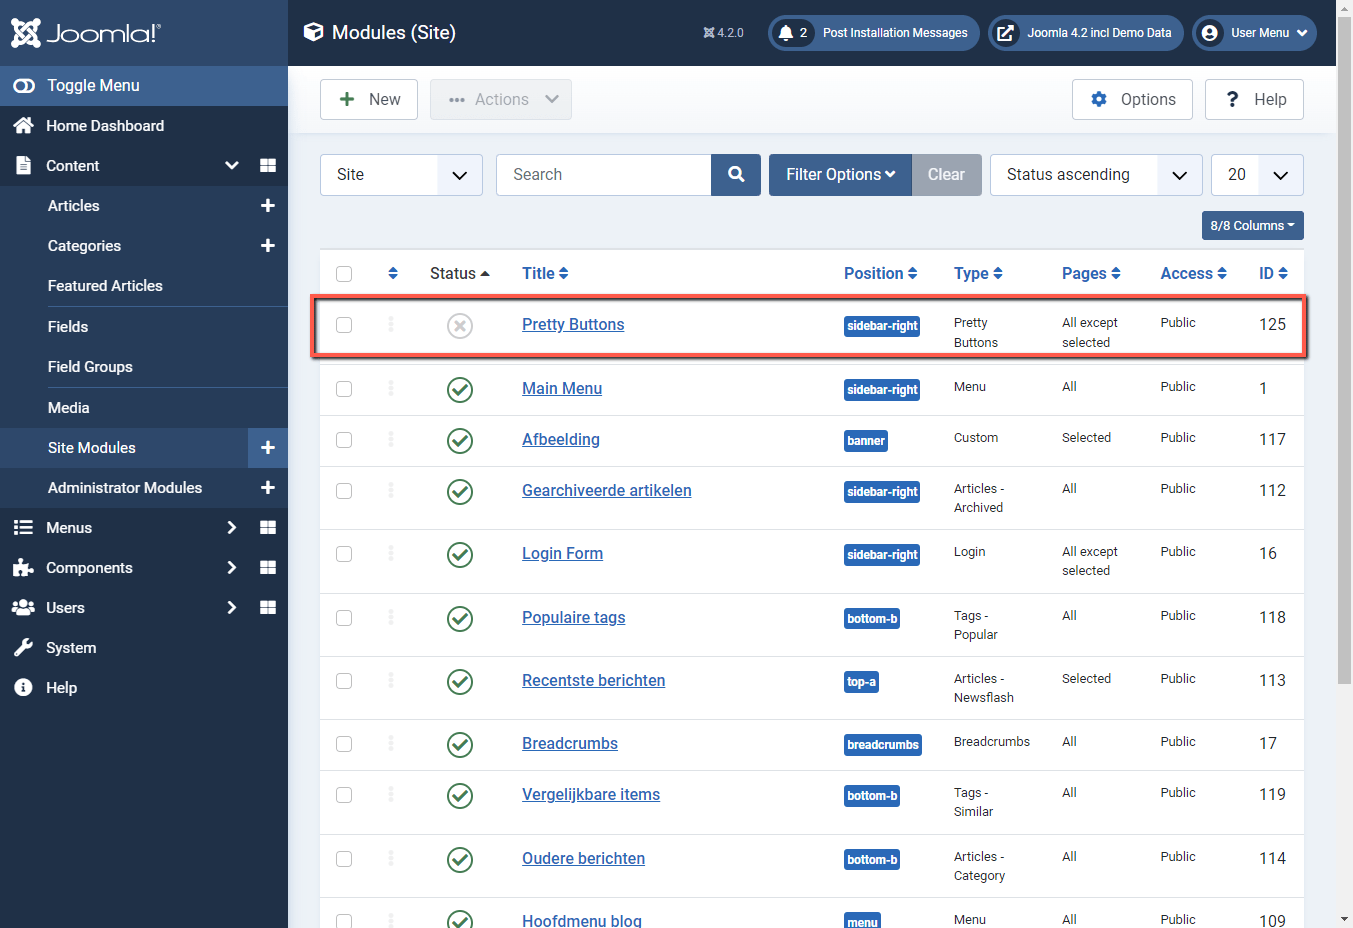
- Click under Title on Pretty Buttons. Zie bovenstaande printscreen.
- At Title*, change the name to, for example, Contact Information
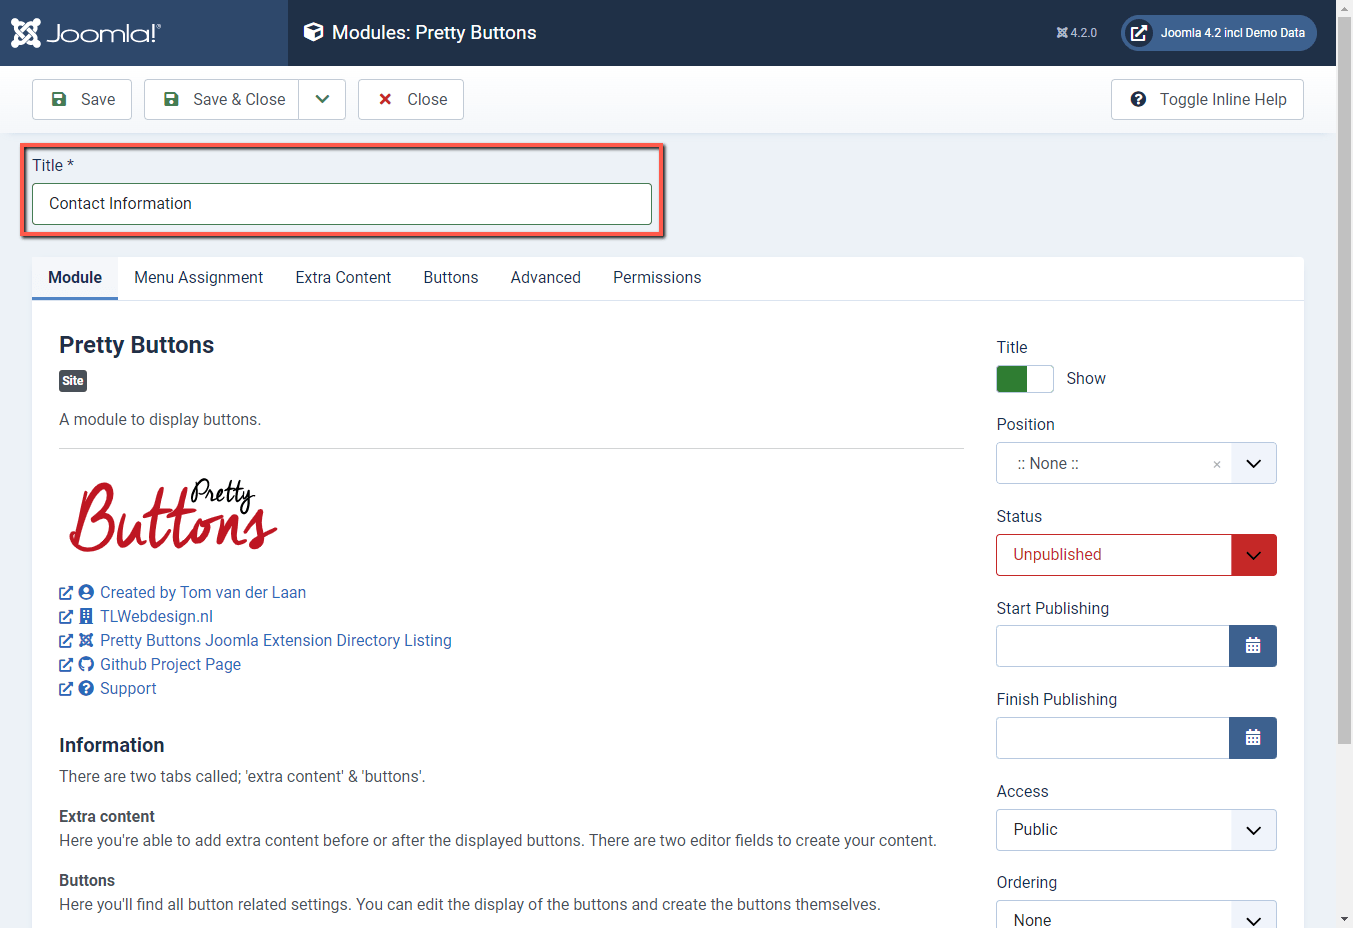
(You can also disable the title of course. To do so, click on the right side under Title on Show, the option changes to Hide). - At Position select the correct module position of your template. In this example with Casiopeia template Sidebar-right [sidebar]-right].
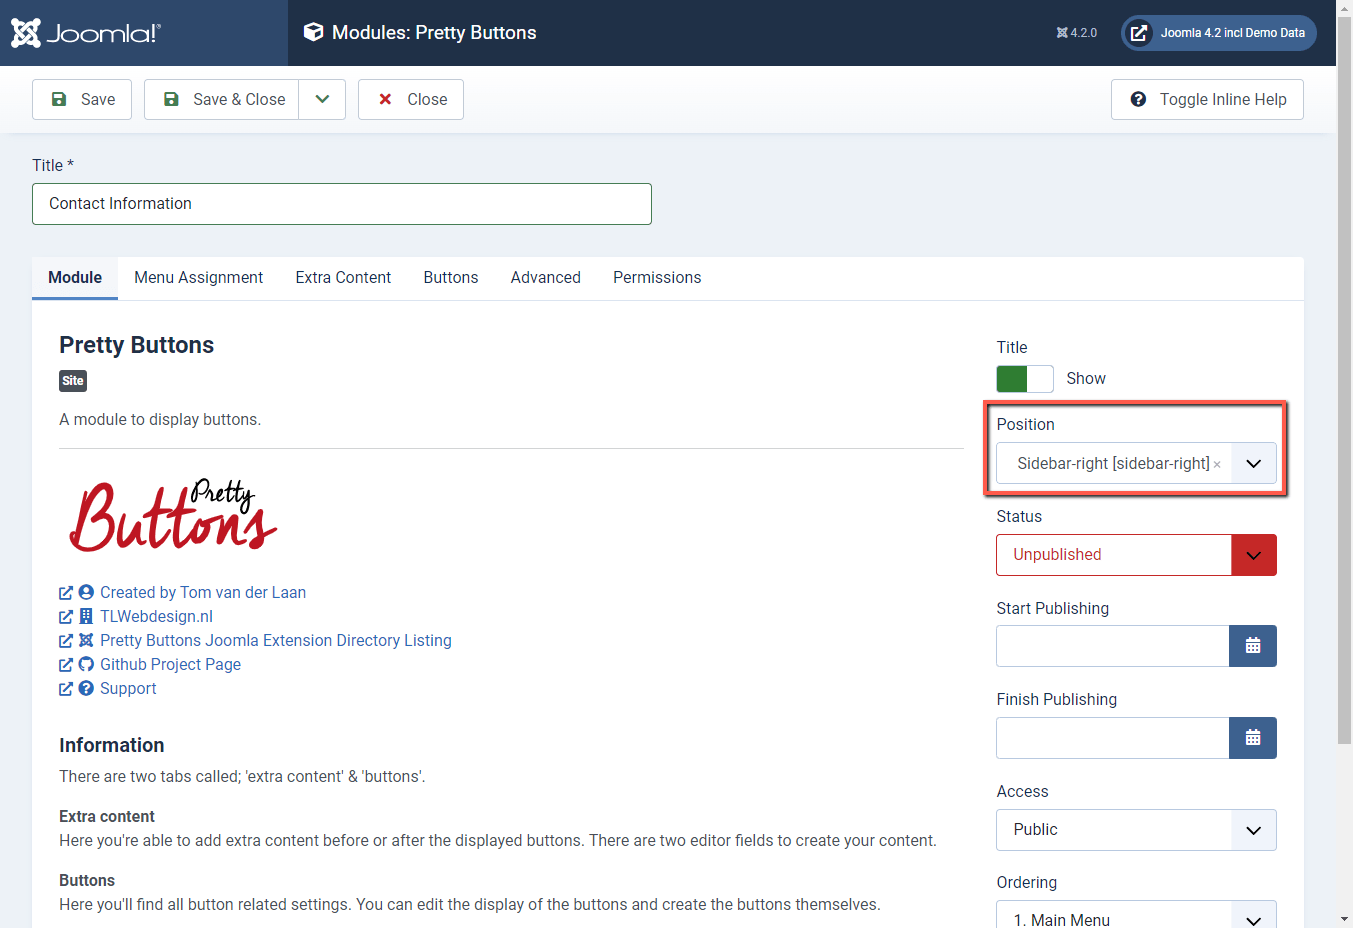
- Under Status, select the option, Published. (By default, a new module's Status is always set to Unpublished). See the print screen above.
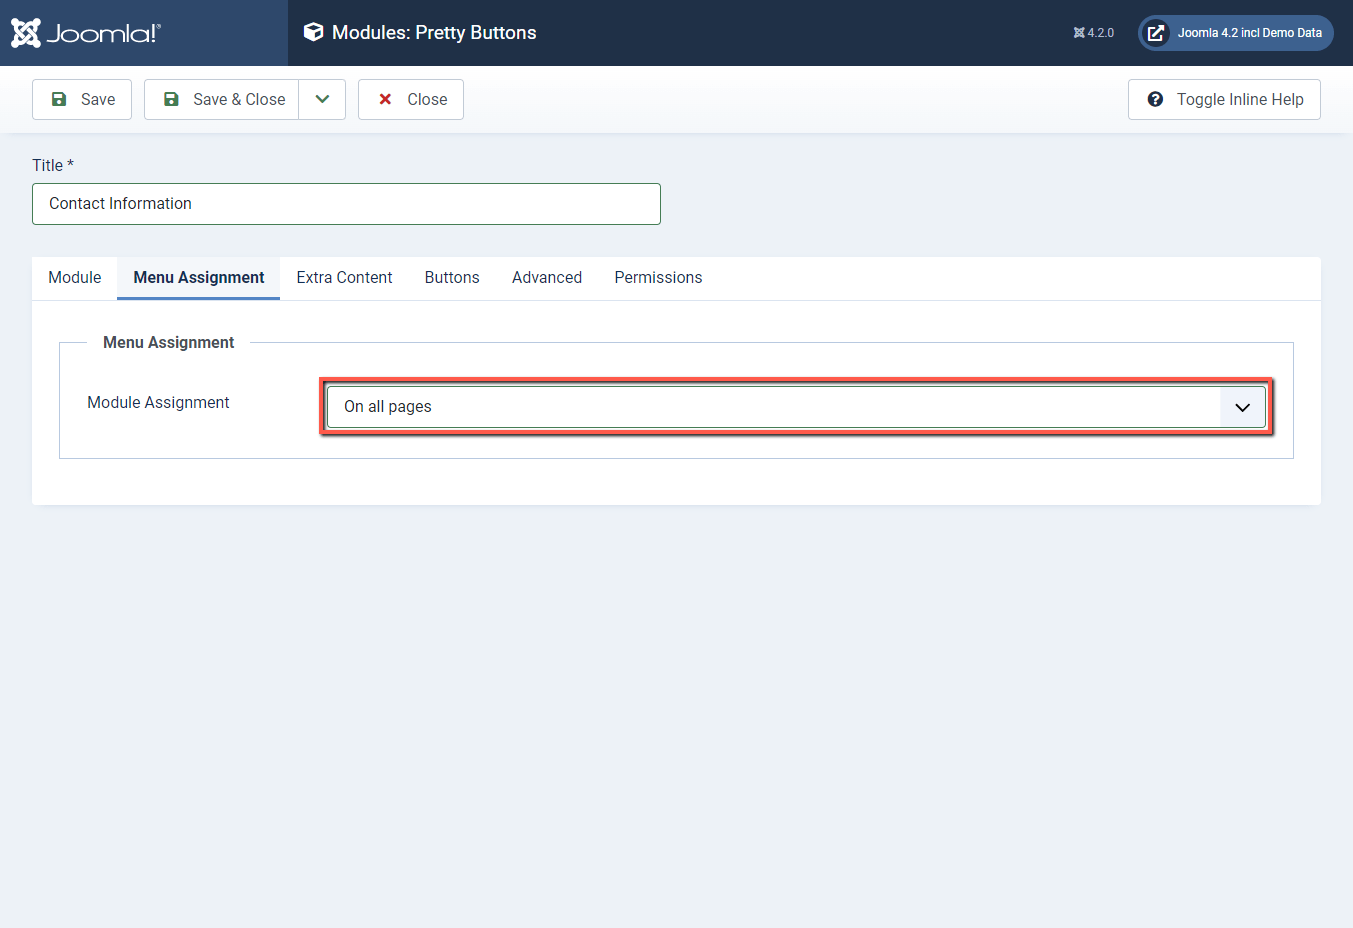
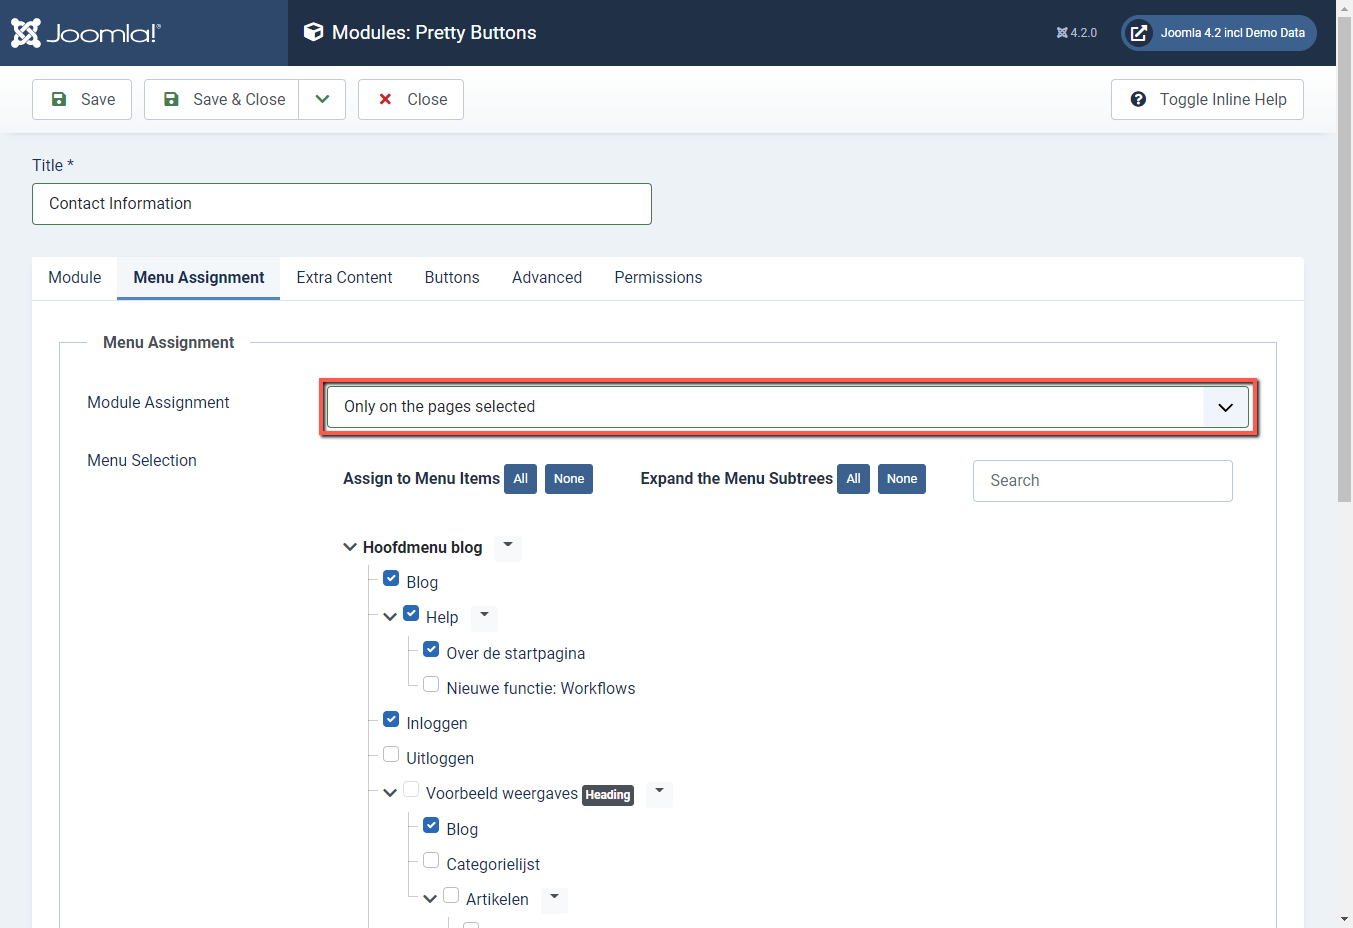
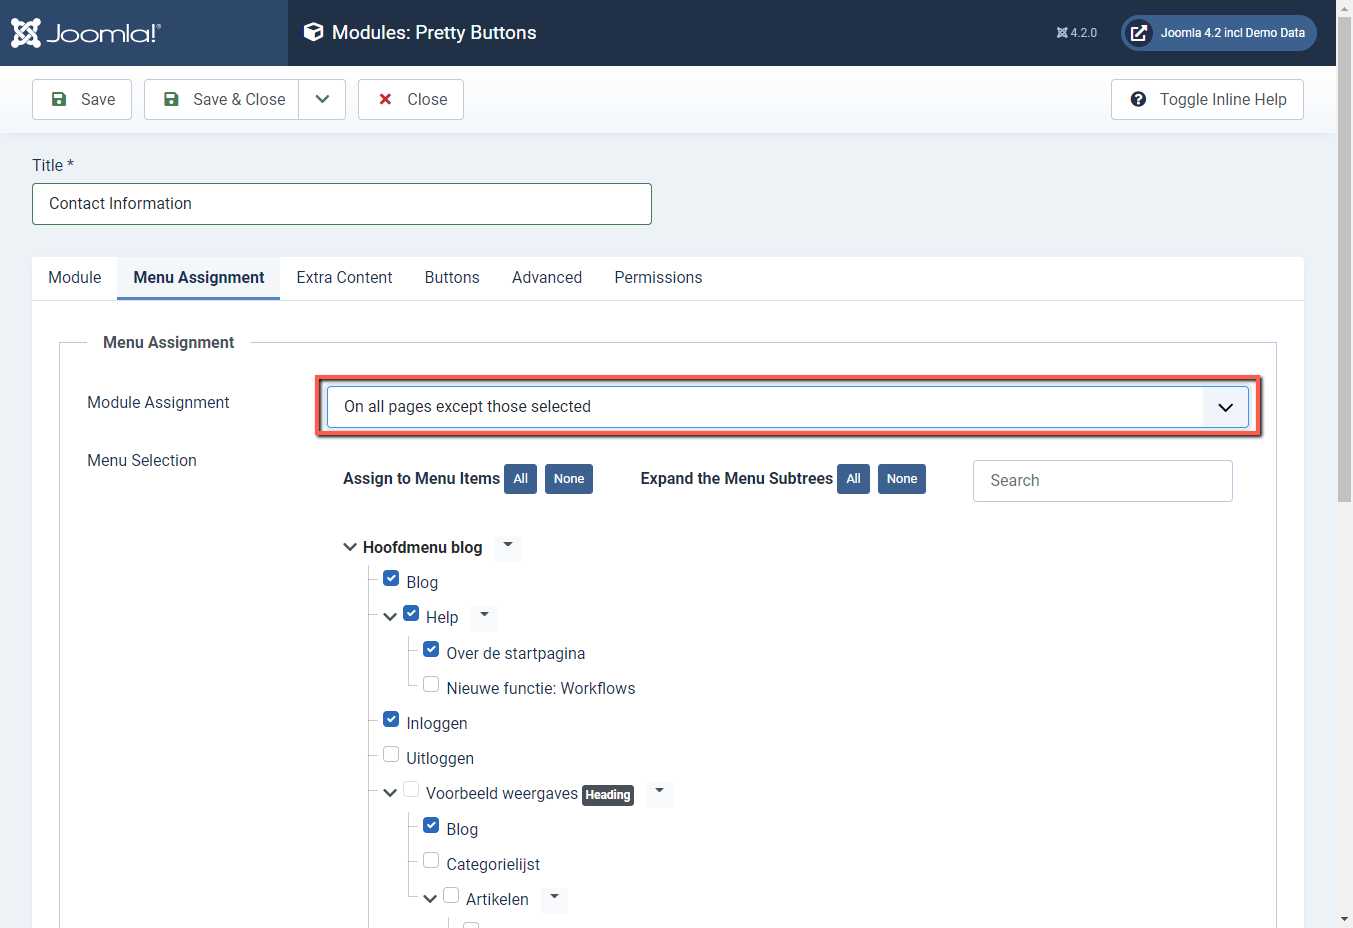
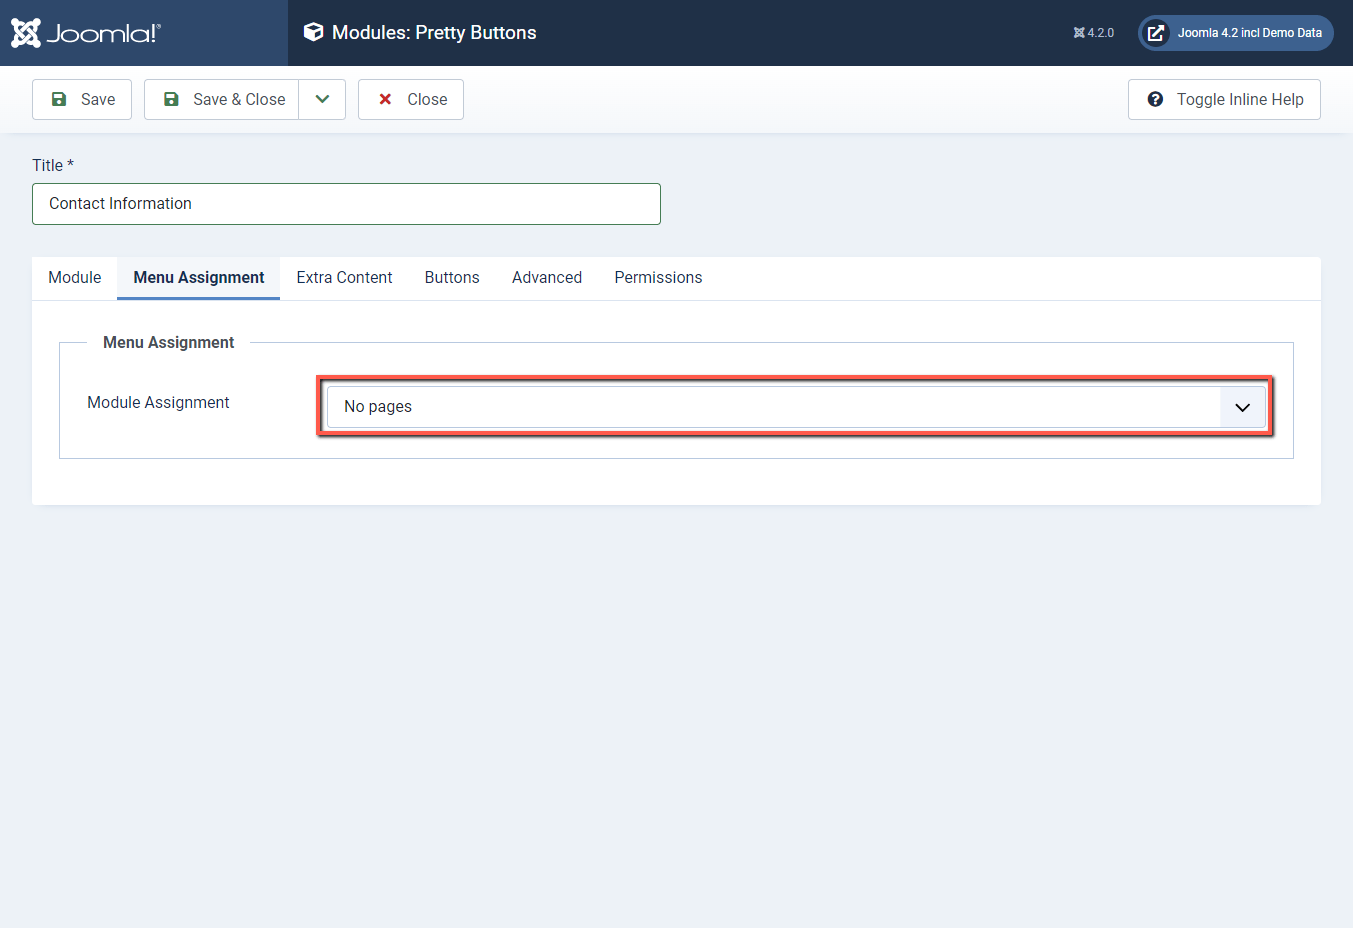
- Click on the Menu Assignment tab and indicate here on which pages (menu items) you want to show the module, by default this is set to No Pages!
- Click on the Extra Content tab.
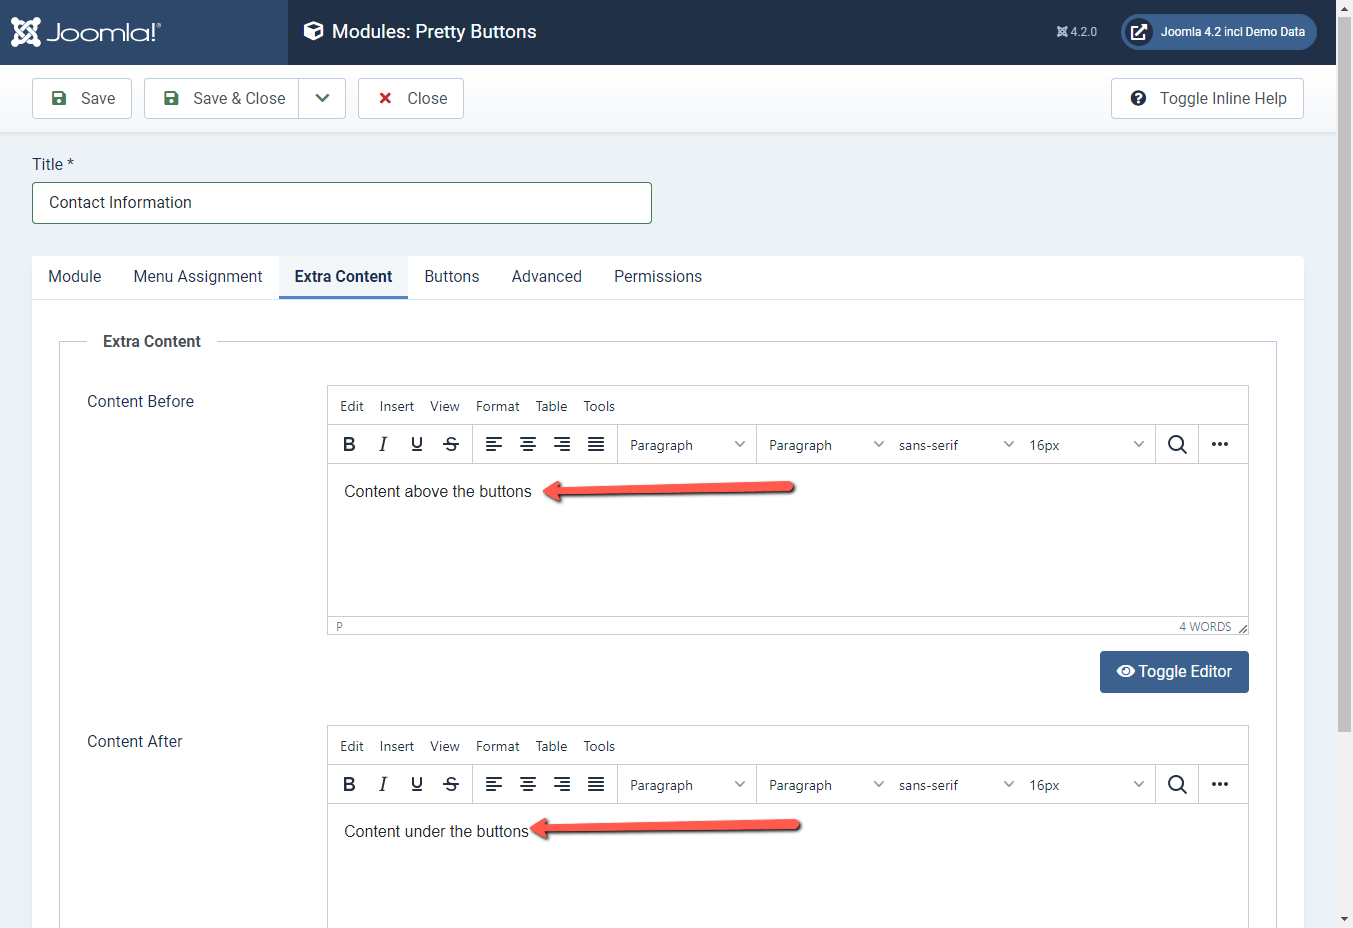
- At Content Before, enter the text to appear above the buttons. See printscreen Step 11.
At Content After, enter the text that should appear below the buttons. See printscreen Step 11. - Click on the Buttons tab and now add at least 1 button.
- At Button Text, enter the text of the button (e.g. Send an email), see print screen Step 14 d.
- At URL*, enter the link to which the button should point, in this example: mailto:
This email address is being protected from spambots. You need JavaScript enabled to view it. , see print screen Step 14 d. - At Target*, select whether the URL should open in a new window (Open link in new window (BLANK). Or Open link in same window (SELF), see printscreen Step 14 d.
- At Icon Class, enter the Font Awesome icon (or leave it blank if you do NOT want to add an icon). In this example far fa-envelope for an envelope.
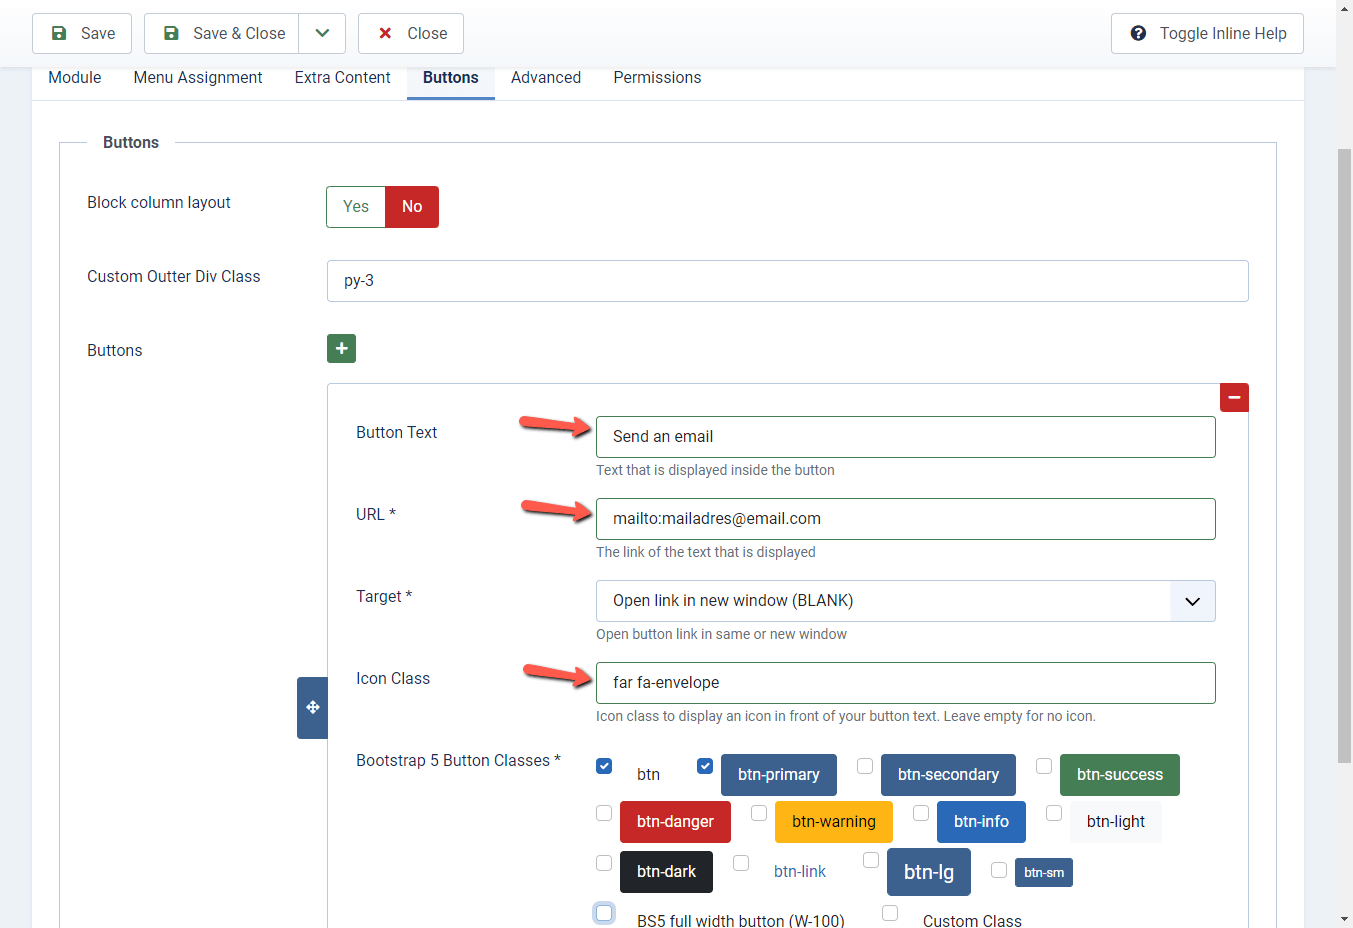
- Select one or more options at Bootstrap 5 Button Classes* The colors and button sizes are there for reference.
- Click Save and view the result in the front-end (visitors' area) of your website.
- Make any further adjustments if desired.
If you're done, click Save & Close (if you made any changes, or Close if you made no more changes).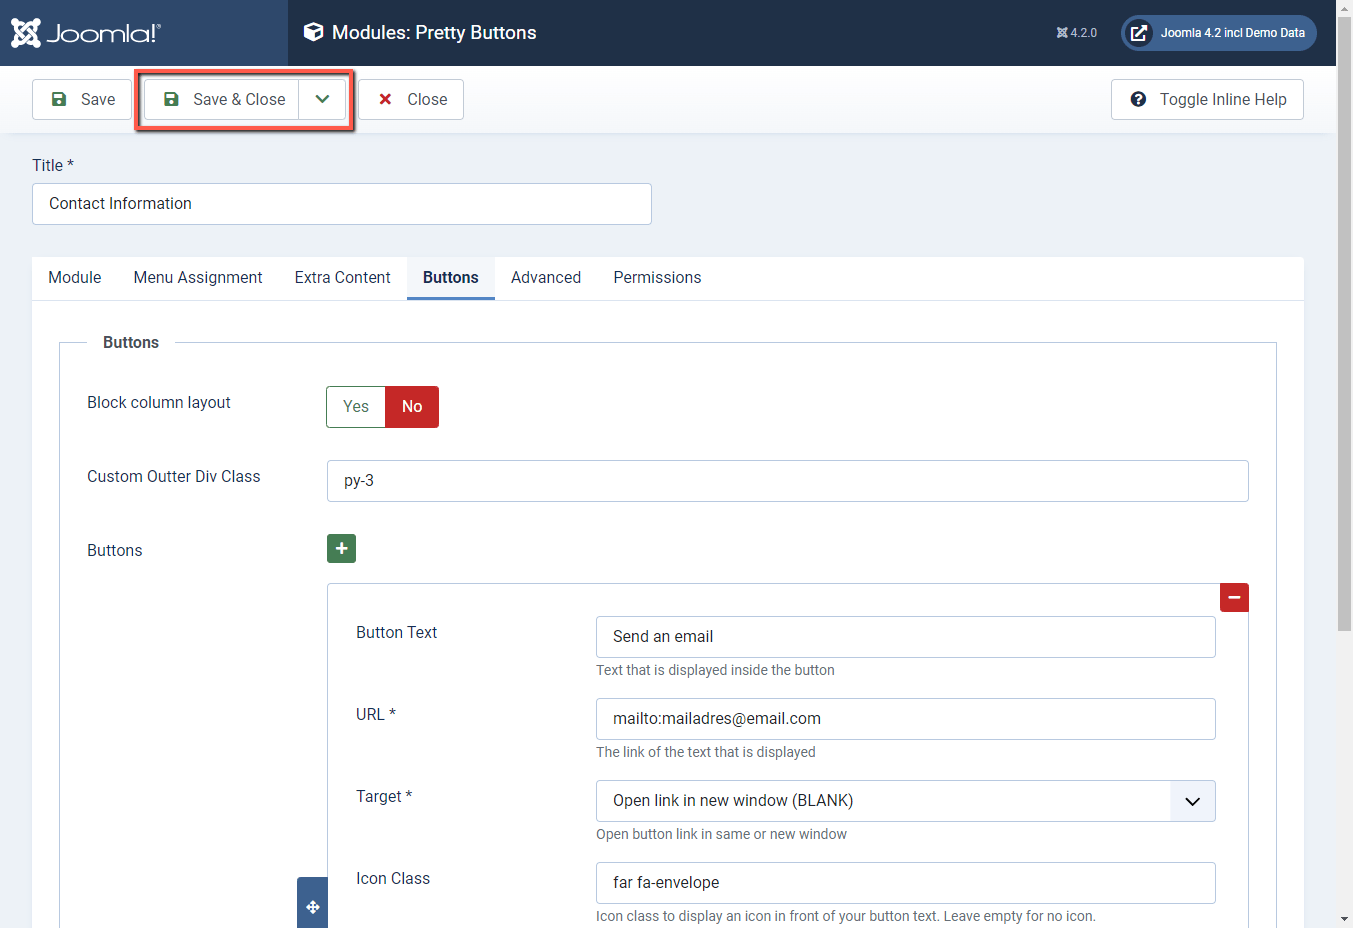
- Below the result:
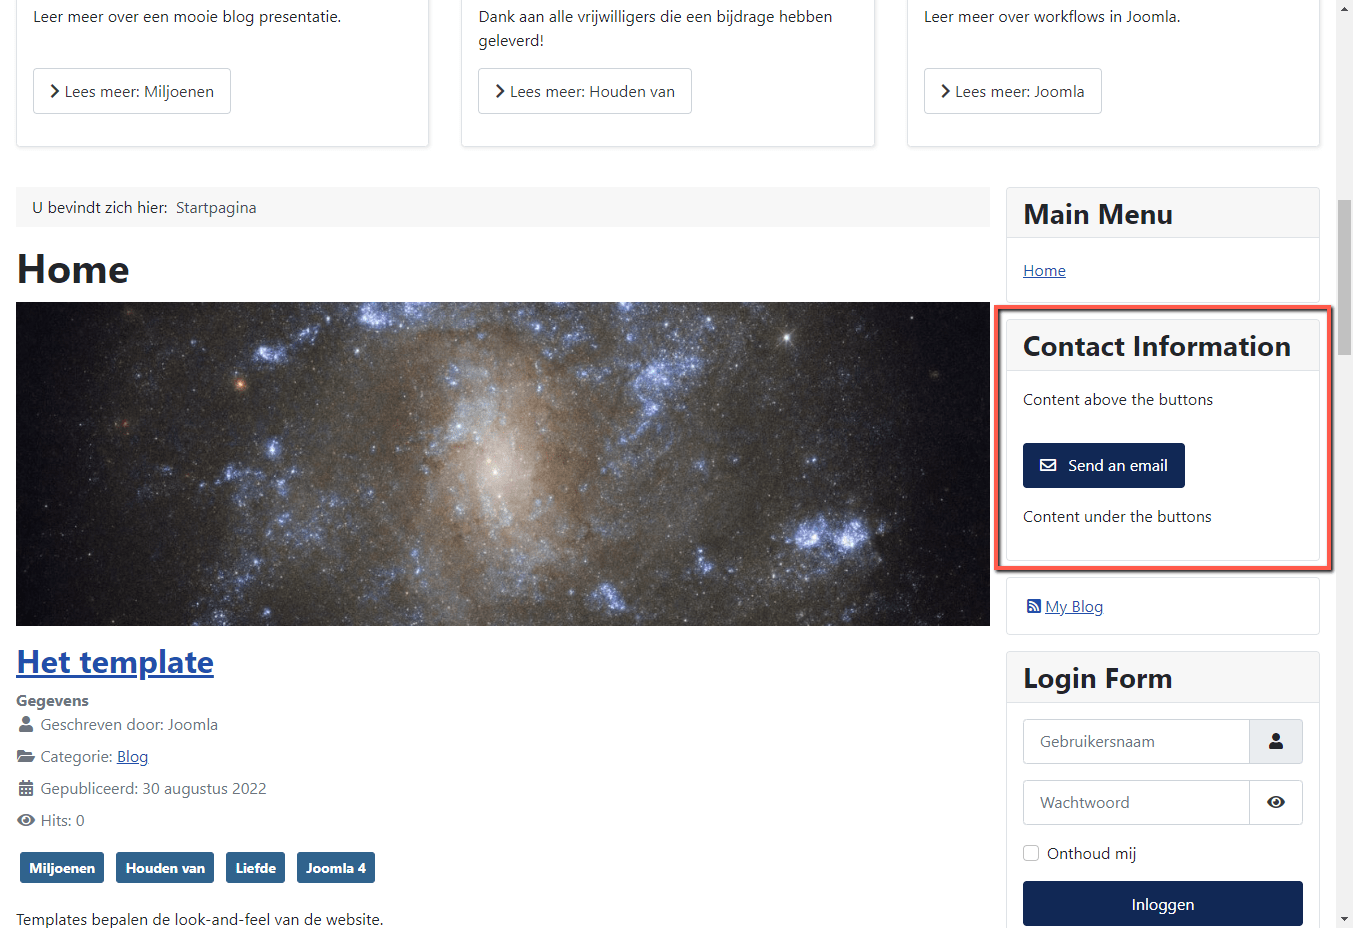
You can find examples here: https://extensions.tlwebdesign.nl/en/pretty-buttons
Assign or adjust module position / page view Pretty Buttons
Below are the steps to assign (or modify) Pretty Buttons to a module position including pages in Joomla 4.
- Log in to your back-end (administration part) of Joomla 4, usually accessible at: https://<yourdomain>/administrator/.
- Log in with your Super Administrator account (SuperAdmin rights).

- In the Home Dashboard on the left, click on System.

- Under the Manage block, click Site Modules.

- Click on the Pretty Buttons module (see column type)

- In the Module tab, on the right side you will find the Position option, select the desired module position here, click the Save button.
- Click on the Menu Assignment tab and indicate here on which pages (menu items) you want to show the module, by default this is set to No Pages!

- Finally, click on the Save and Close button.

- Now test if the module is shown on the right page(s).
Update Pretty Buttons
Below are the steps for updating Pretty Buttons in Joomla 4.
As soon as an update has become available, it will be visible in the back-end of Joomla. Just as it is for most other Joomla extension updates. The update becomes visible in the Control Panel in the Notifications block, or under System Control Panel and then the Updates block.
Important Note: Always make a Backup of your website before updating!
- Log in to your back-end (administration part) of Joomla 4, usually accessible at: https://<yourdomain>/administrator/.
- Log in with your Super Administrator account (SuperAdmin rights).

- In the block under Notifications, click Updates are available!.
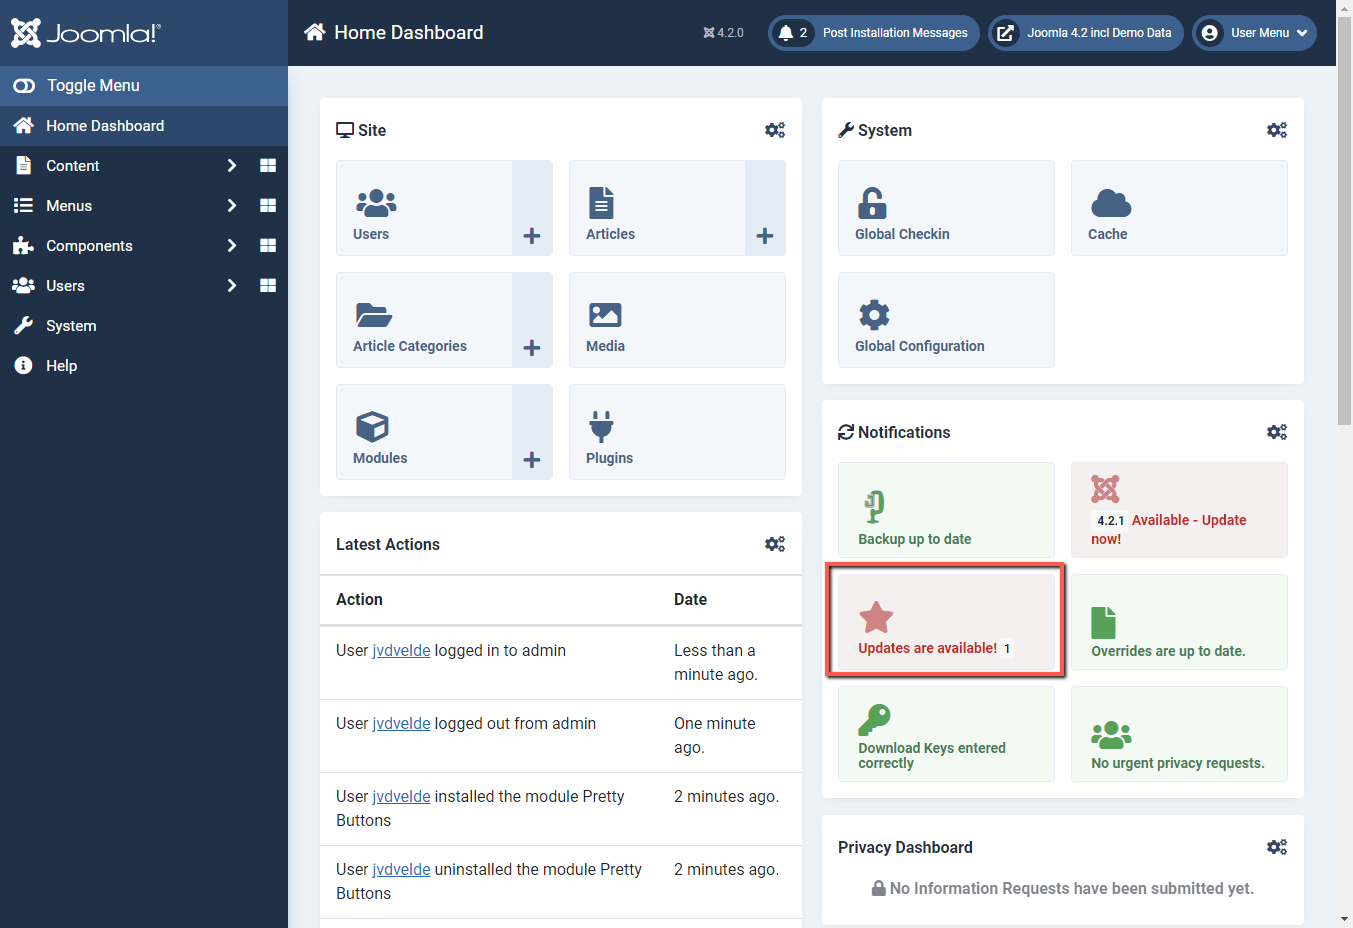
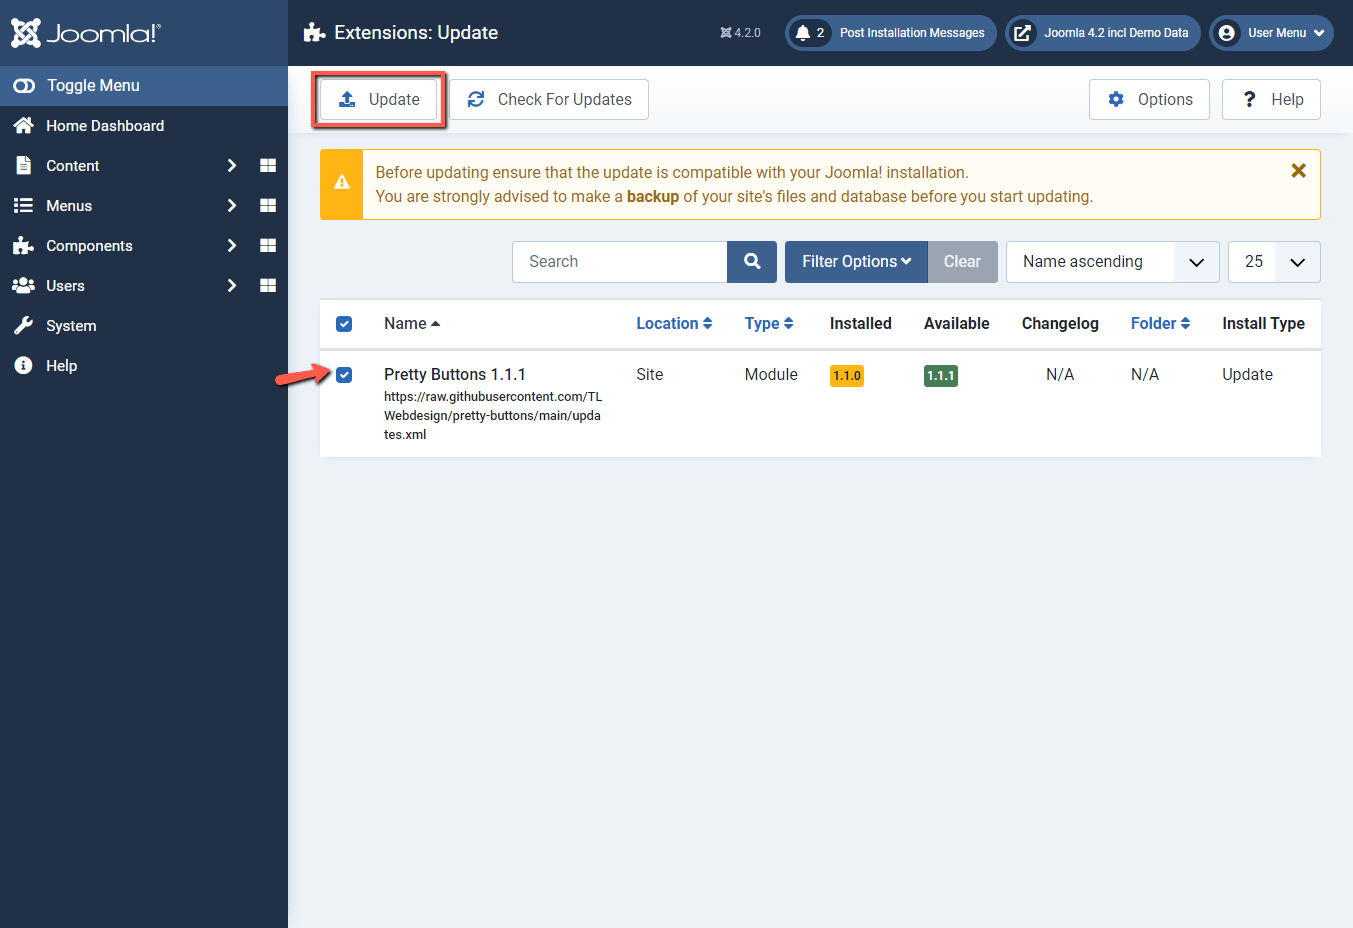
(Or via System under block Update, on Extensions) - Place a checkmark in front of Pretty Buttons (in this example, follows the update from version 1.1.0 to version 1.1.1) and click the Update button.
- A message will appear on the screen "Updating Package succeeded".
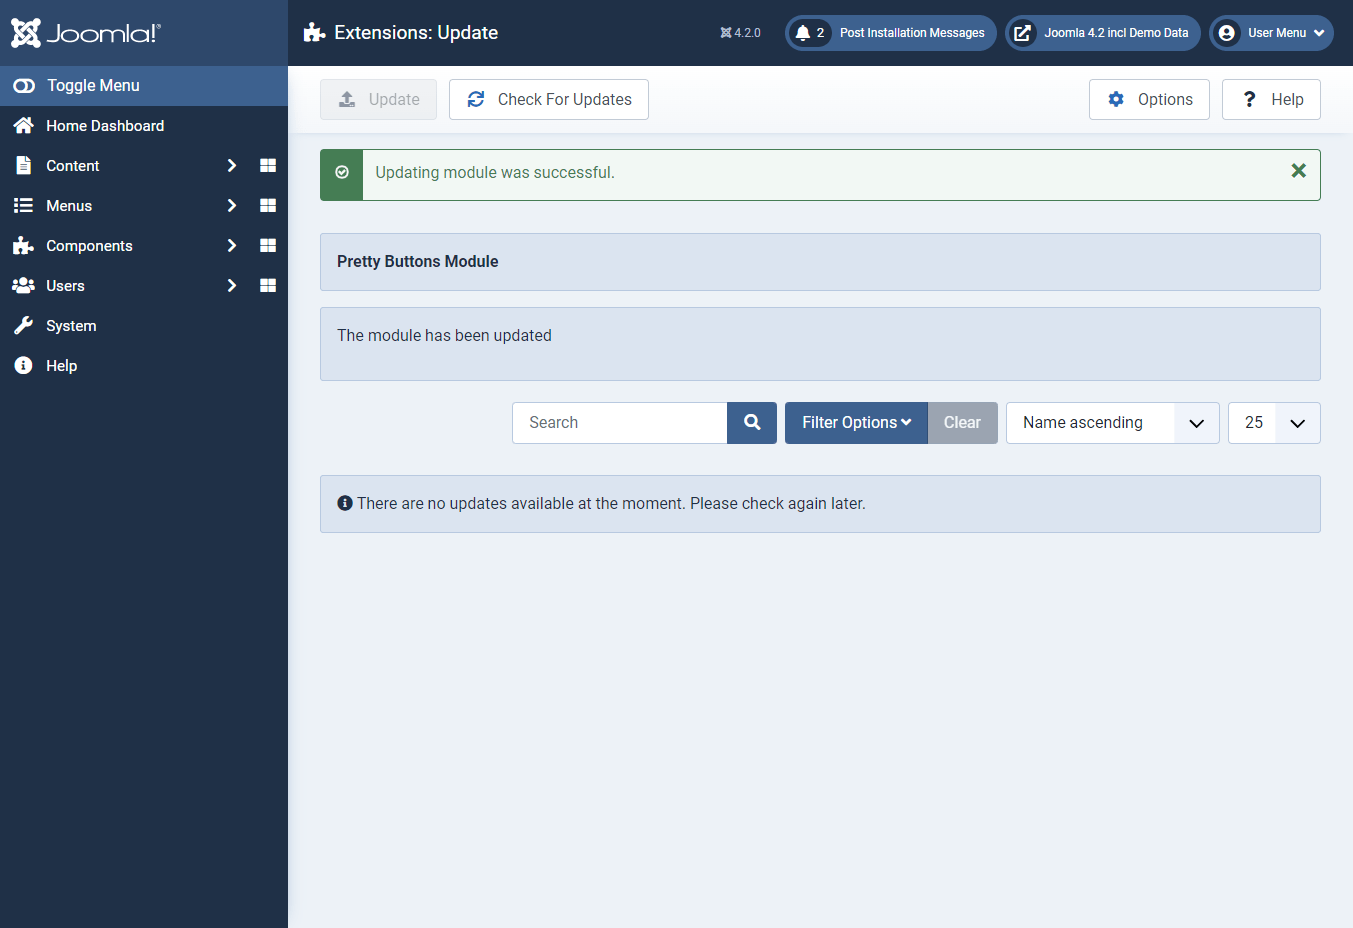
- Check that Pretty Buttons is still working properly.
Uninstall Pretty Buttons
If you no longer want to use Pretty Buttons, you can uninstall (or deinstall) it again, by deleting it. Below is described how to uninstall the module extension in Joomla 4:
- Log in to your back-end (administration part) of Joomla 4, usually accessible at: https://<yourdomain>/administrator/.
- Log in with your Super Administrator account (SuperAdmin rights).

- In the Home Dashboard on the left, click on System.

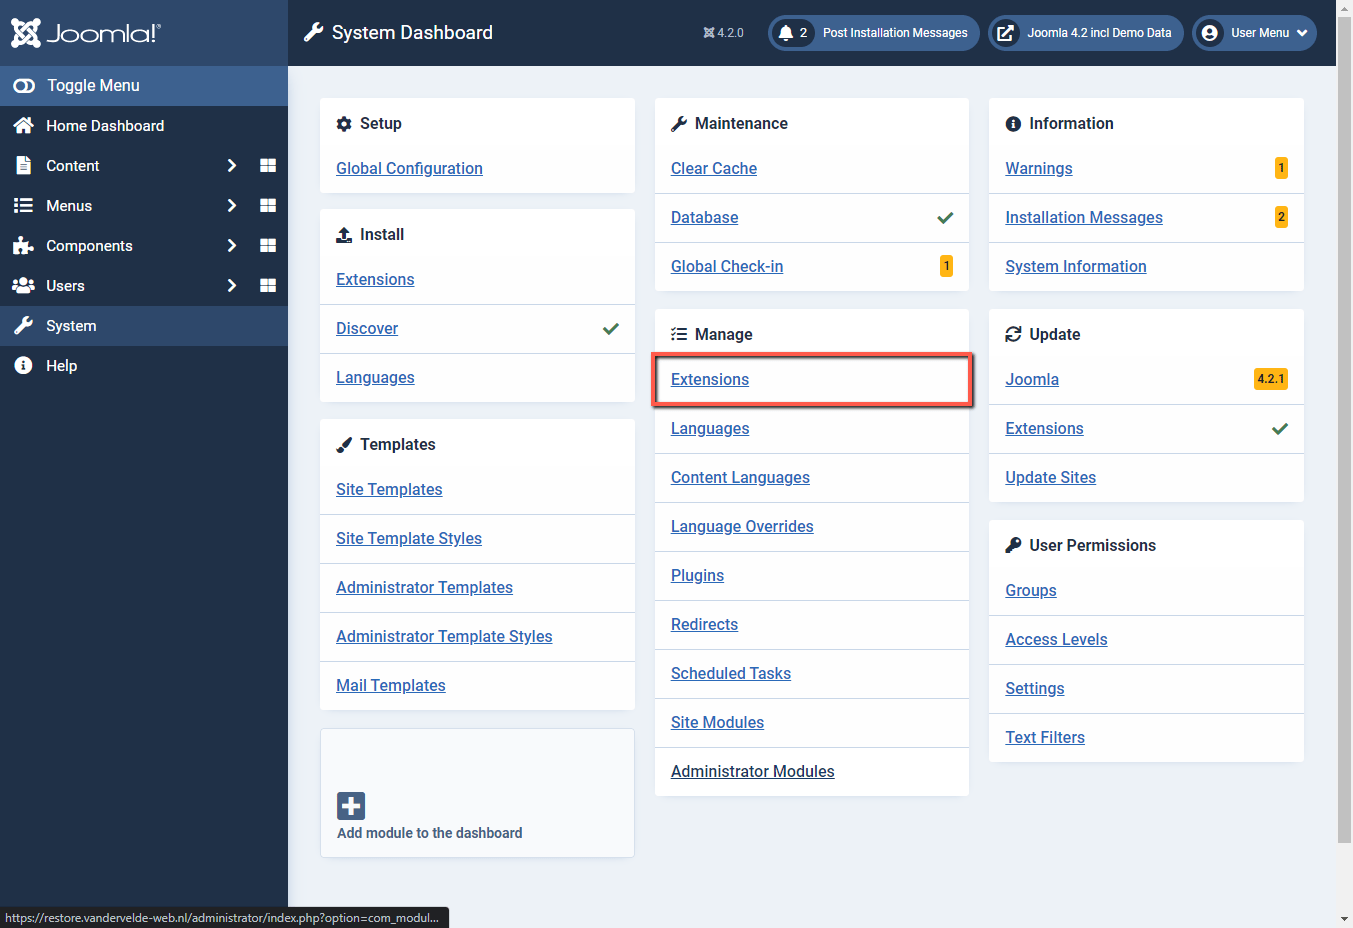
- Under the Manage block, click Extensions.
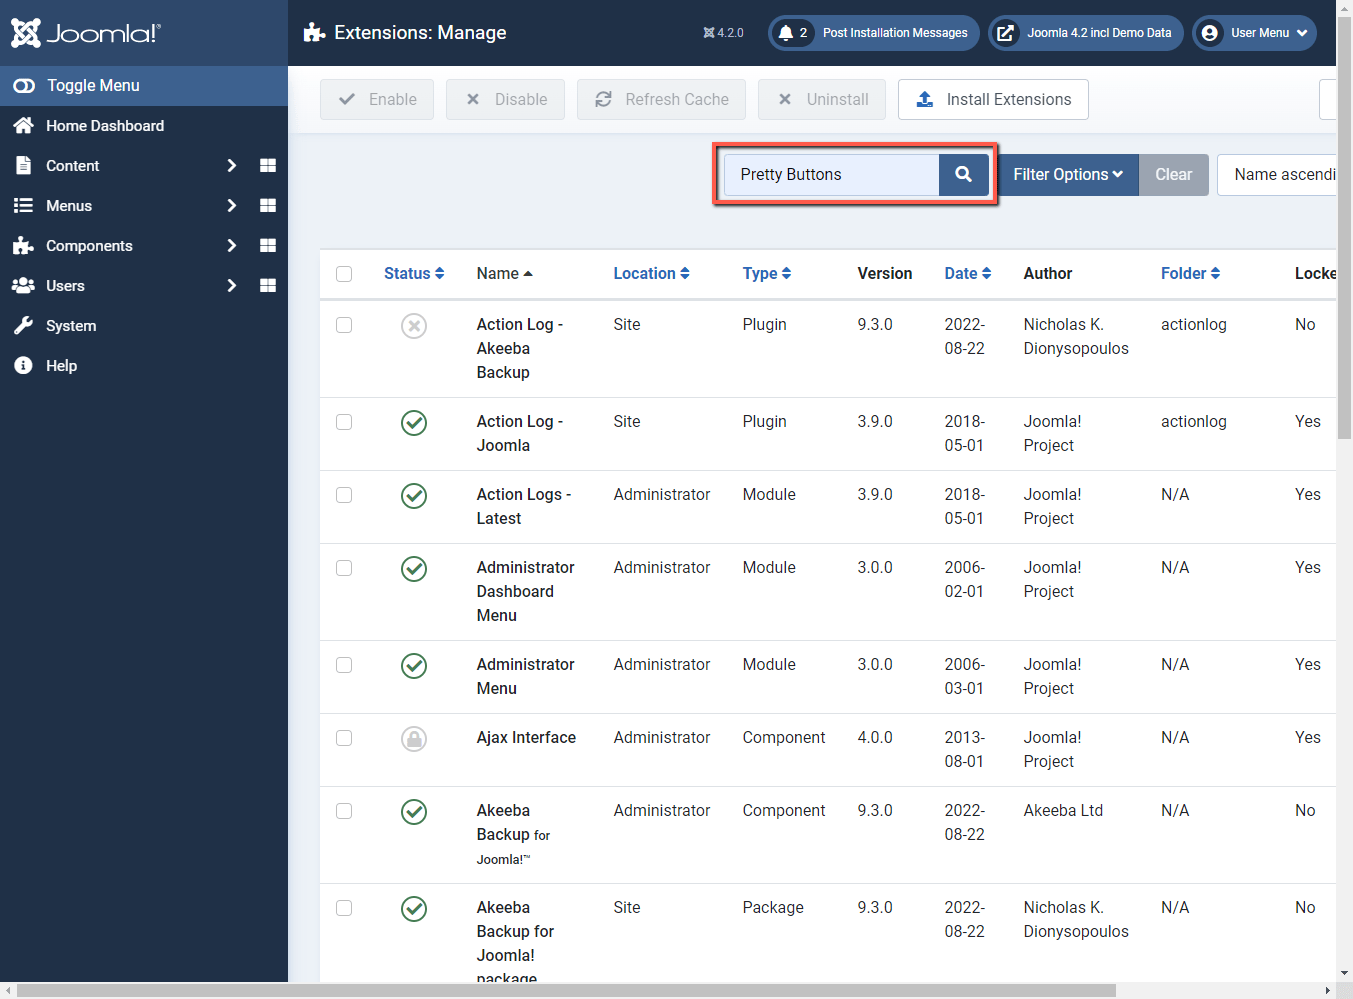
- In the search window, type Pretty Buttons and click on the magnifying glass.
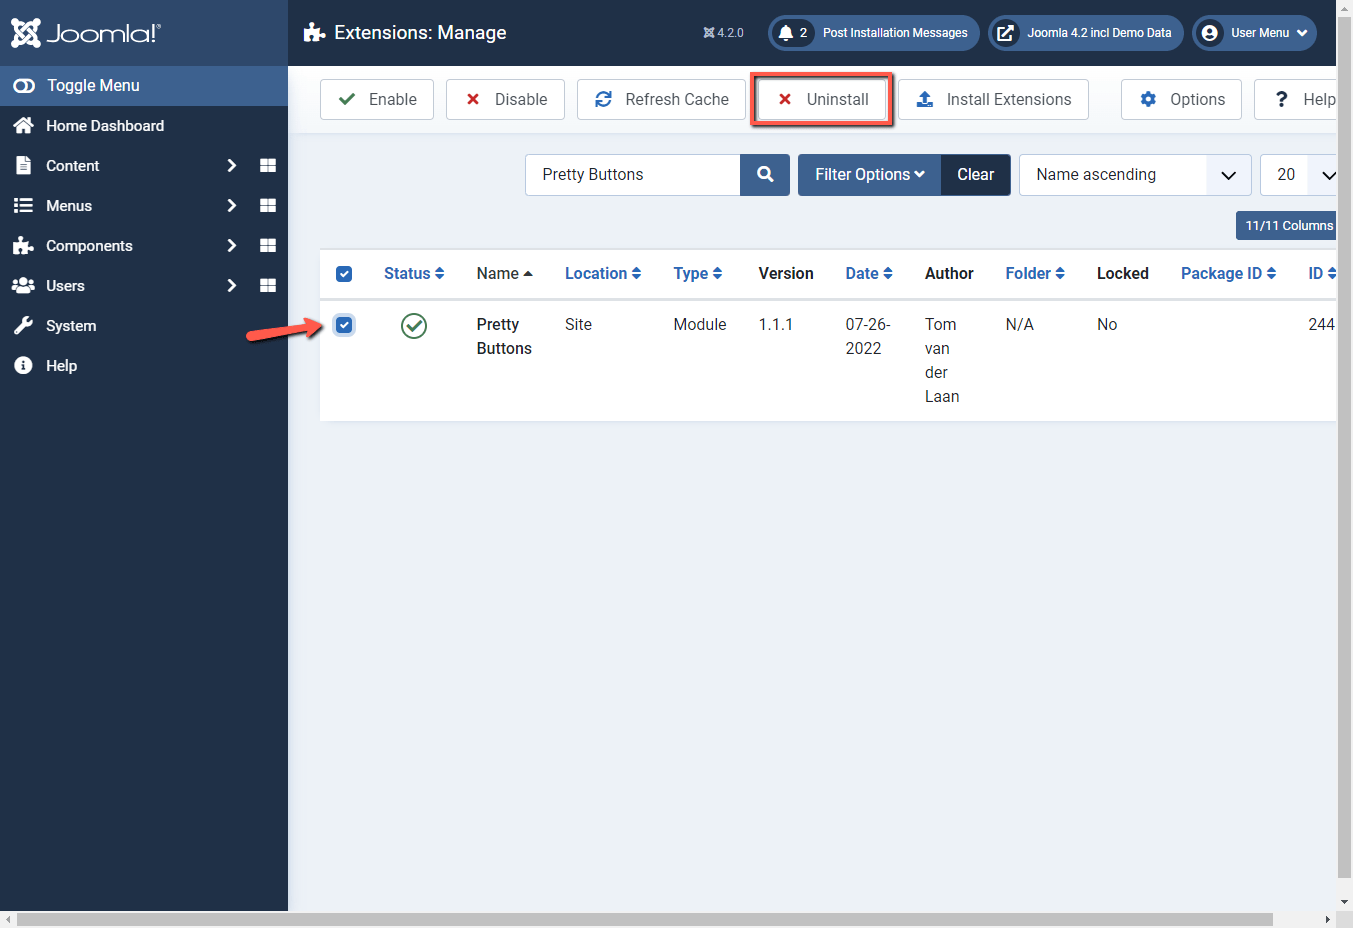
- Place a check mark in front of the Pretty Buttons extension, then click the Uninstall button
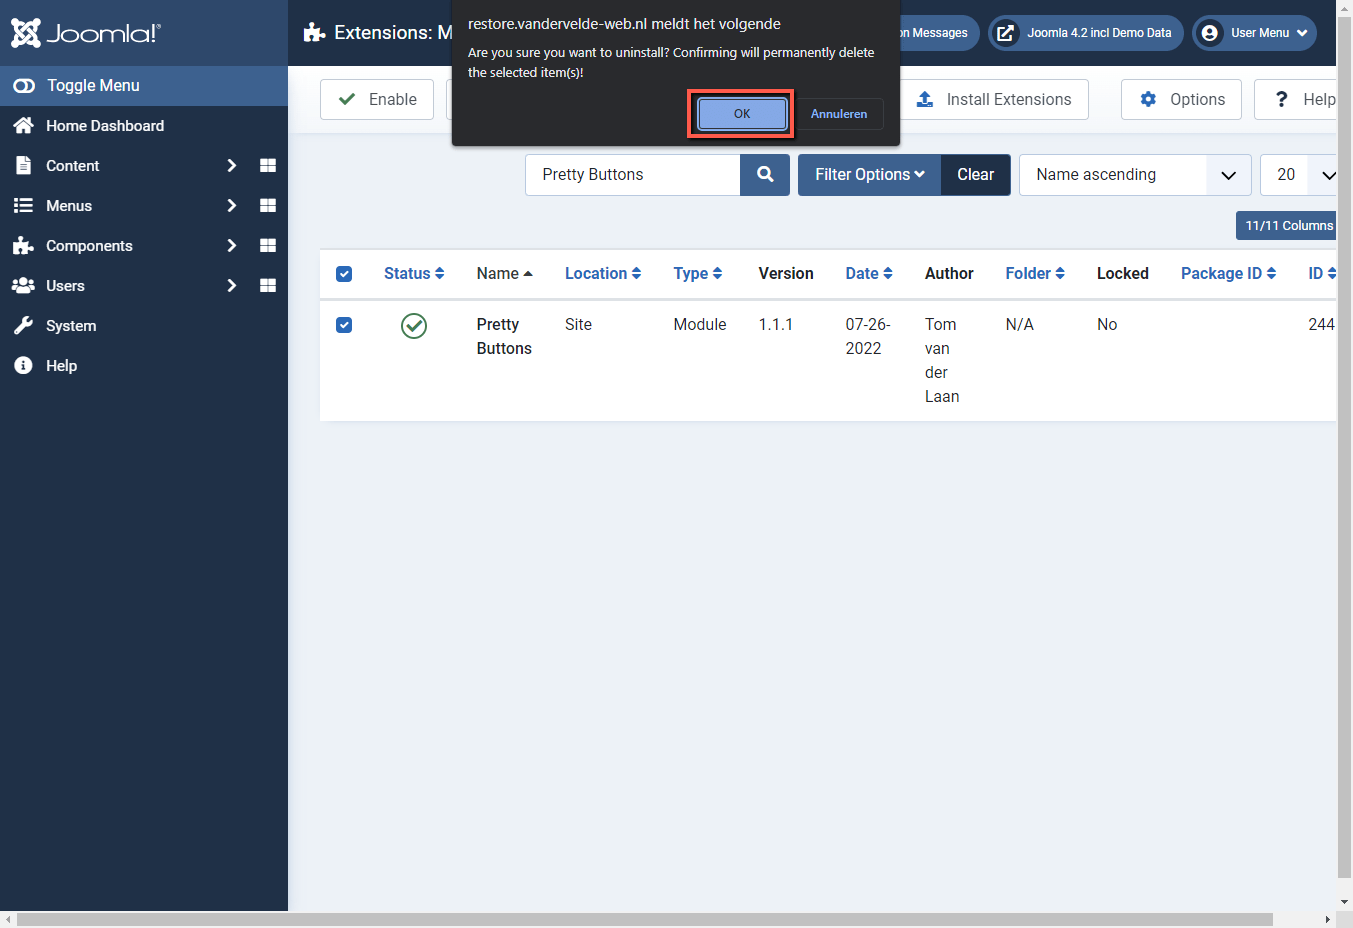
- Then click on the OK button,
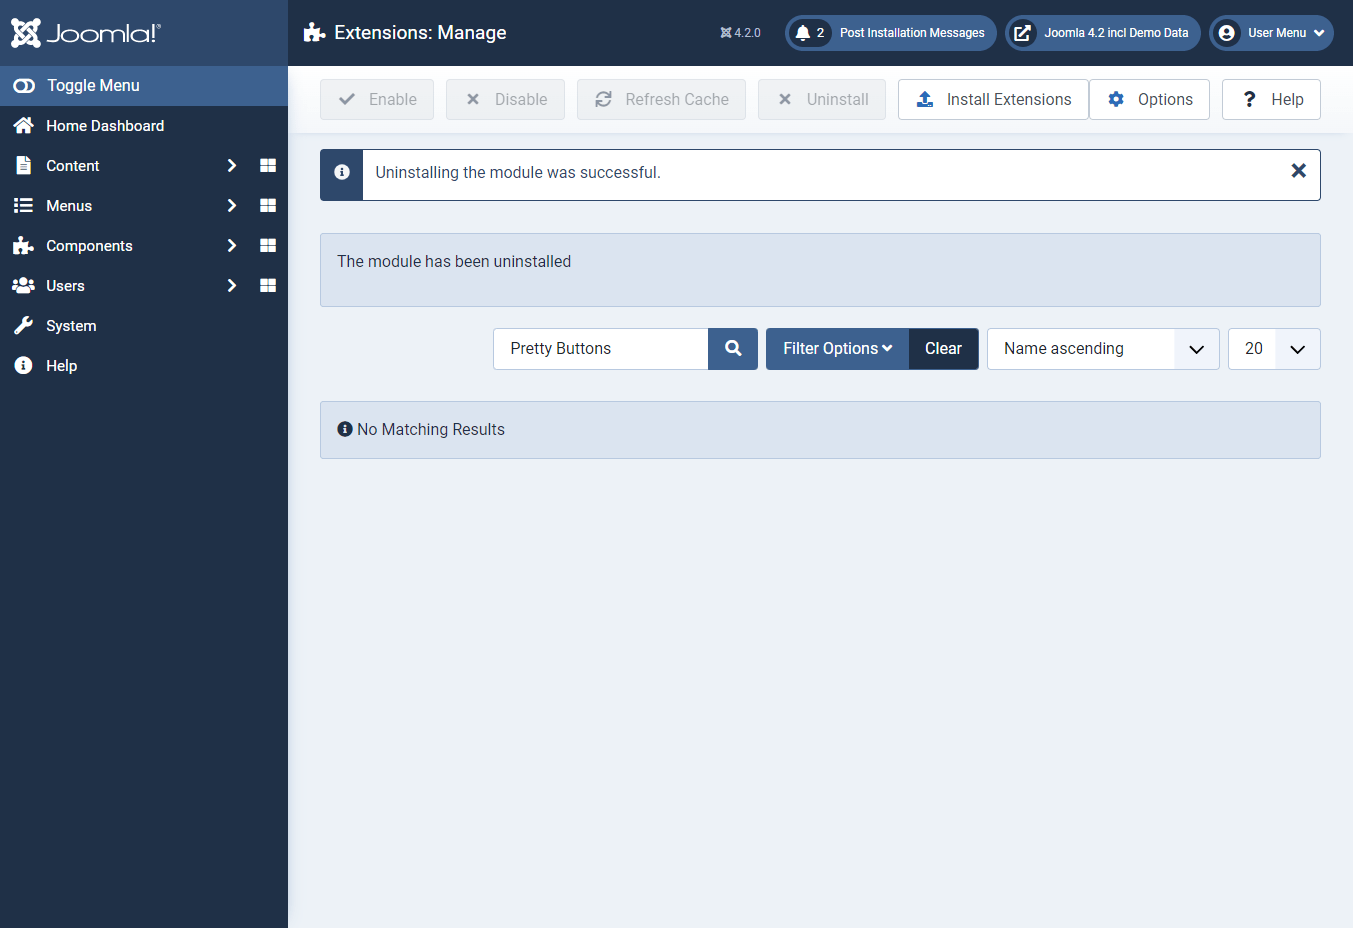
- The extension is now removed. A message will appear on the screen "Uninstalling the module was successful".
If you run into any problems, let us know click the button below. This is the only way we can further optimize this extension.
Report problem
If you are satisfied, then please leave a review on the Joomla Extensions Directory page: https://extensions.joomla.org/extension/pretty-buttons/
Thanks in advance!
 Nederlands
  English (UK)
